2. Introduction to Testing
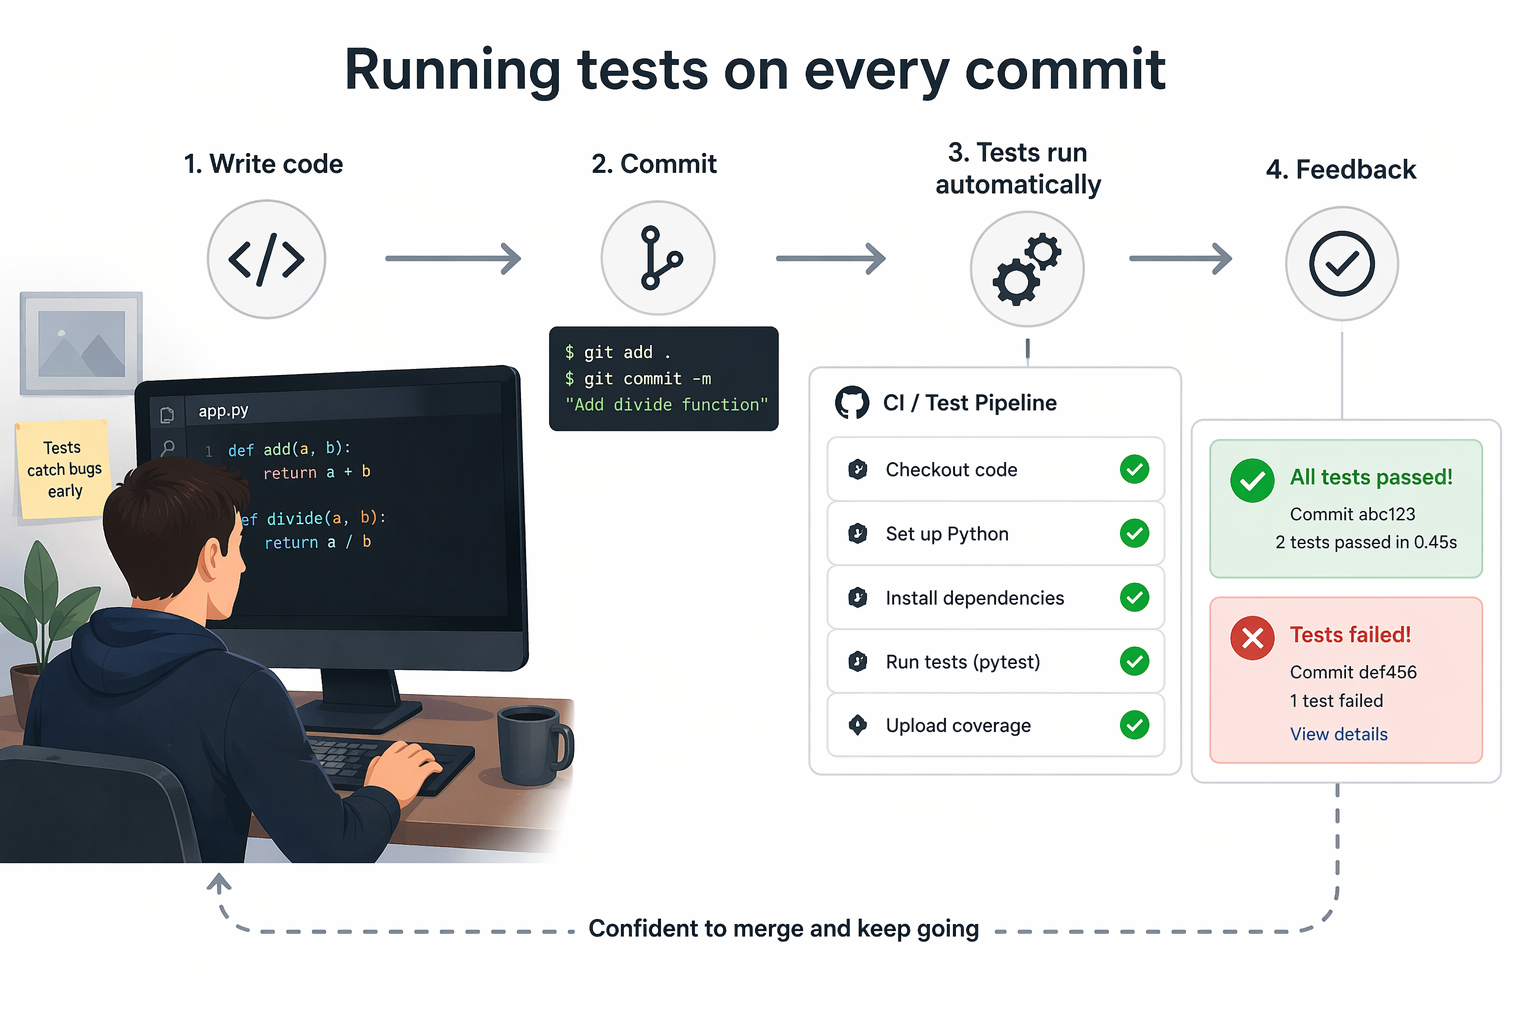
A test is code that asserts how your code should behave. Write the check once, run it on every commit, and the guarantee scales with the codebase. When a later change breaks an assumption, the test suite tells you which assumption and where.
Here's what the whole cycle looks like once you've got it running.
Unit tests and integration tests
Two kinds of automated test matter for Python APIs.
Unit tests
A unit test is a small, focused test that targets a single unit of code, usually one function or class, and verifies that it behaves correctly. It runs that unit in isolation, without relying on external systems like APIs or databases, so it stays fast and predictable. The value is precision: when a unit test fails, it points directly to the piece of logic that broke.
Here's what that looks like in code. Say you have a pure helper that converts a Celsius temperature to Fahrenheit. A unit test pins down its behaviour with two quick assertions:
from weather.conversions import celsius_to_fahrenheit

def test_celsius_to_fahrenheit():
    assert celsius_to_fahrenheit(0) == 32
    assert celsius_to_fahrenheit(100) == 212
This test runs instantly, doesn't depend on anything else, and clearly shows whether the conversion logic is correct.
Integration tests
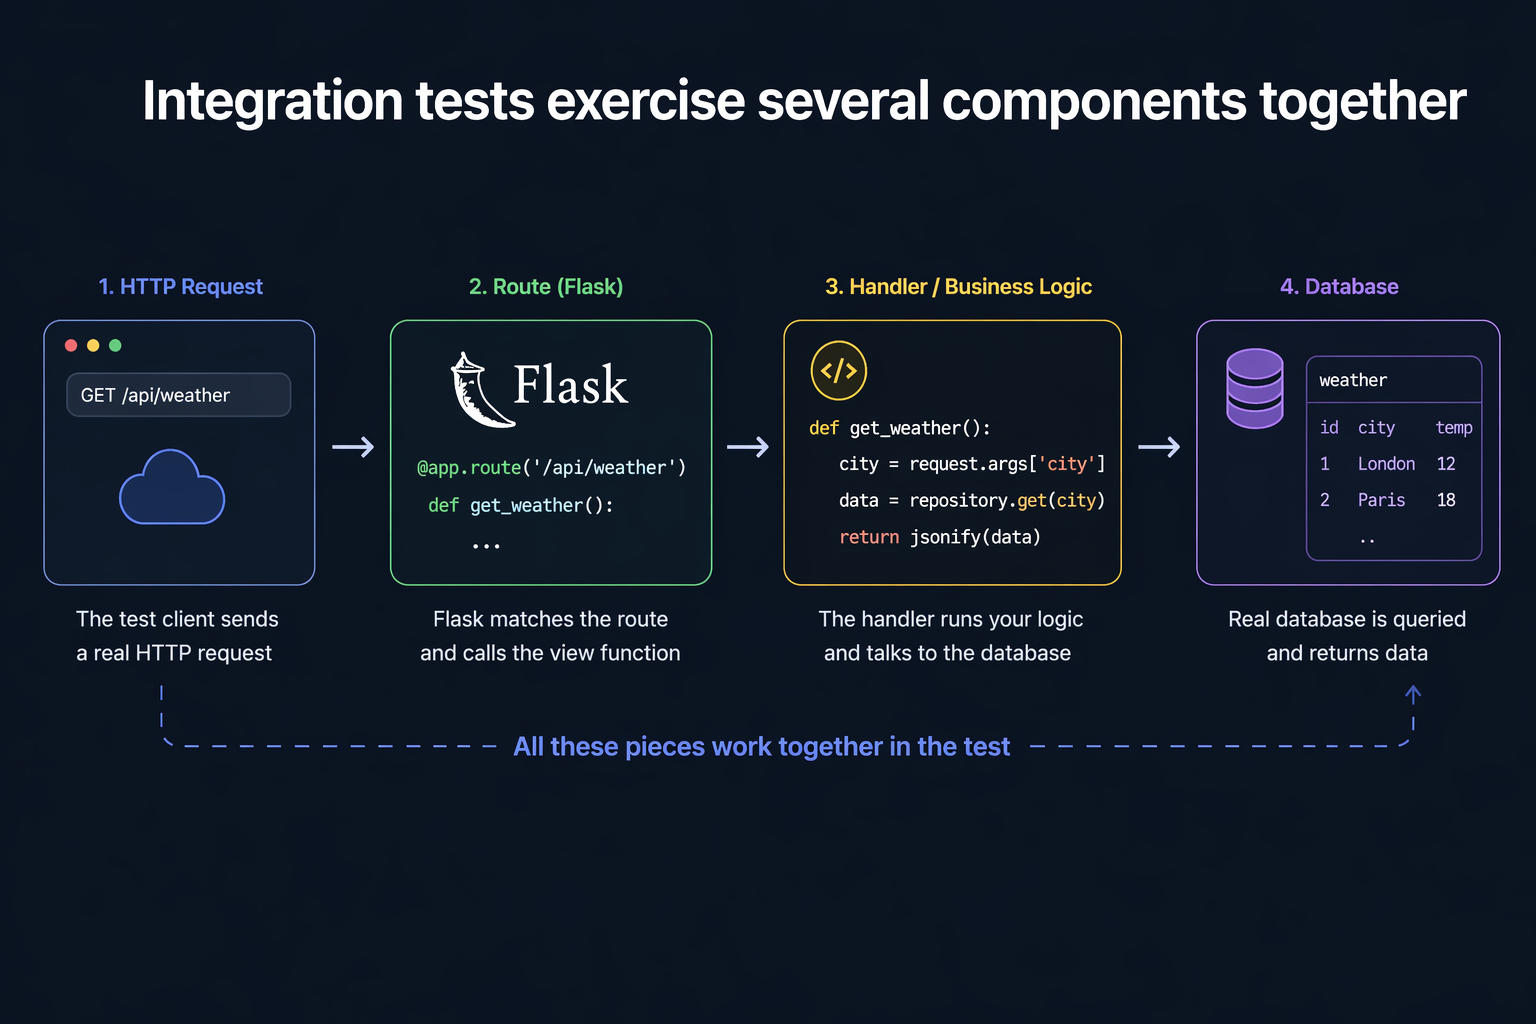
Integration tests exercise several components together (a route, its handler, the database) and catch bugs that only appear when the pieces interact. Most techniques in this guide are integration tests with carefully chosen boundaries: real Flask views, real session cookies, real HTTP request shapes, but no real network. You get the realism of end-to-end testing without the flakiness.
Here's what that looks like in practice. The stack your integration tests will exercise:
Pytest
pytest is a testing framework (Python package). You installed it in Section 1 and we will be using it throughout this chapter to write and run our tests.
pytest is a test runner. It doesn't force you to write tests in a particular style, or use a particular assertion library, or even use classes at all. It's just a tool that finds your tests and runs them, and it gives you great output when they fail.
One important thing before we write our first test: pytest discovers test files and test functions by convention, not configuration, so follow the naming rules:
- Put test files in a
tests/directory next to your source. - Name test files
test_*.py(or*_test.py). - Name test functions
test_*. - Use Python's built-in
assertfor conditions.
Your first test
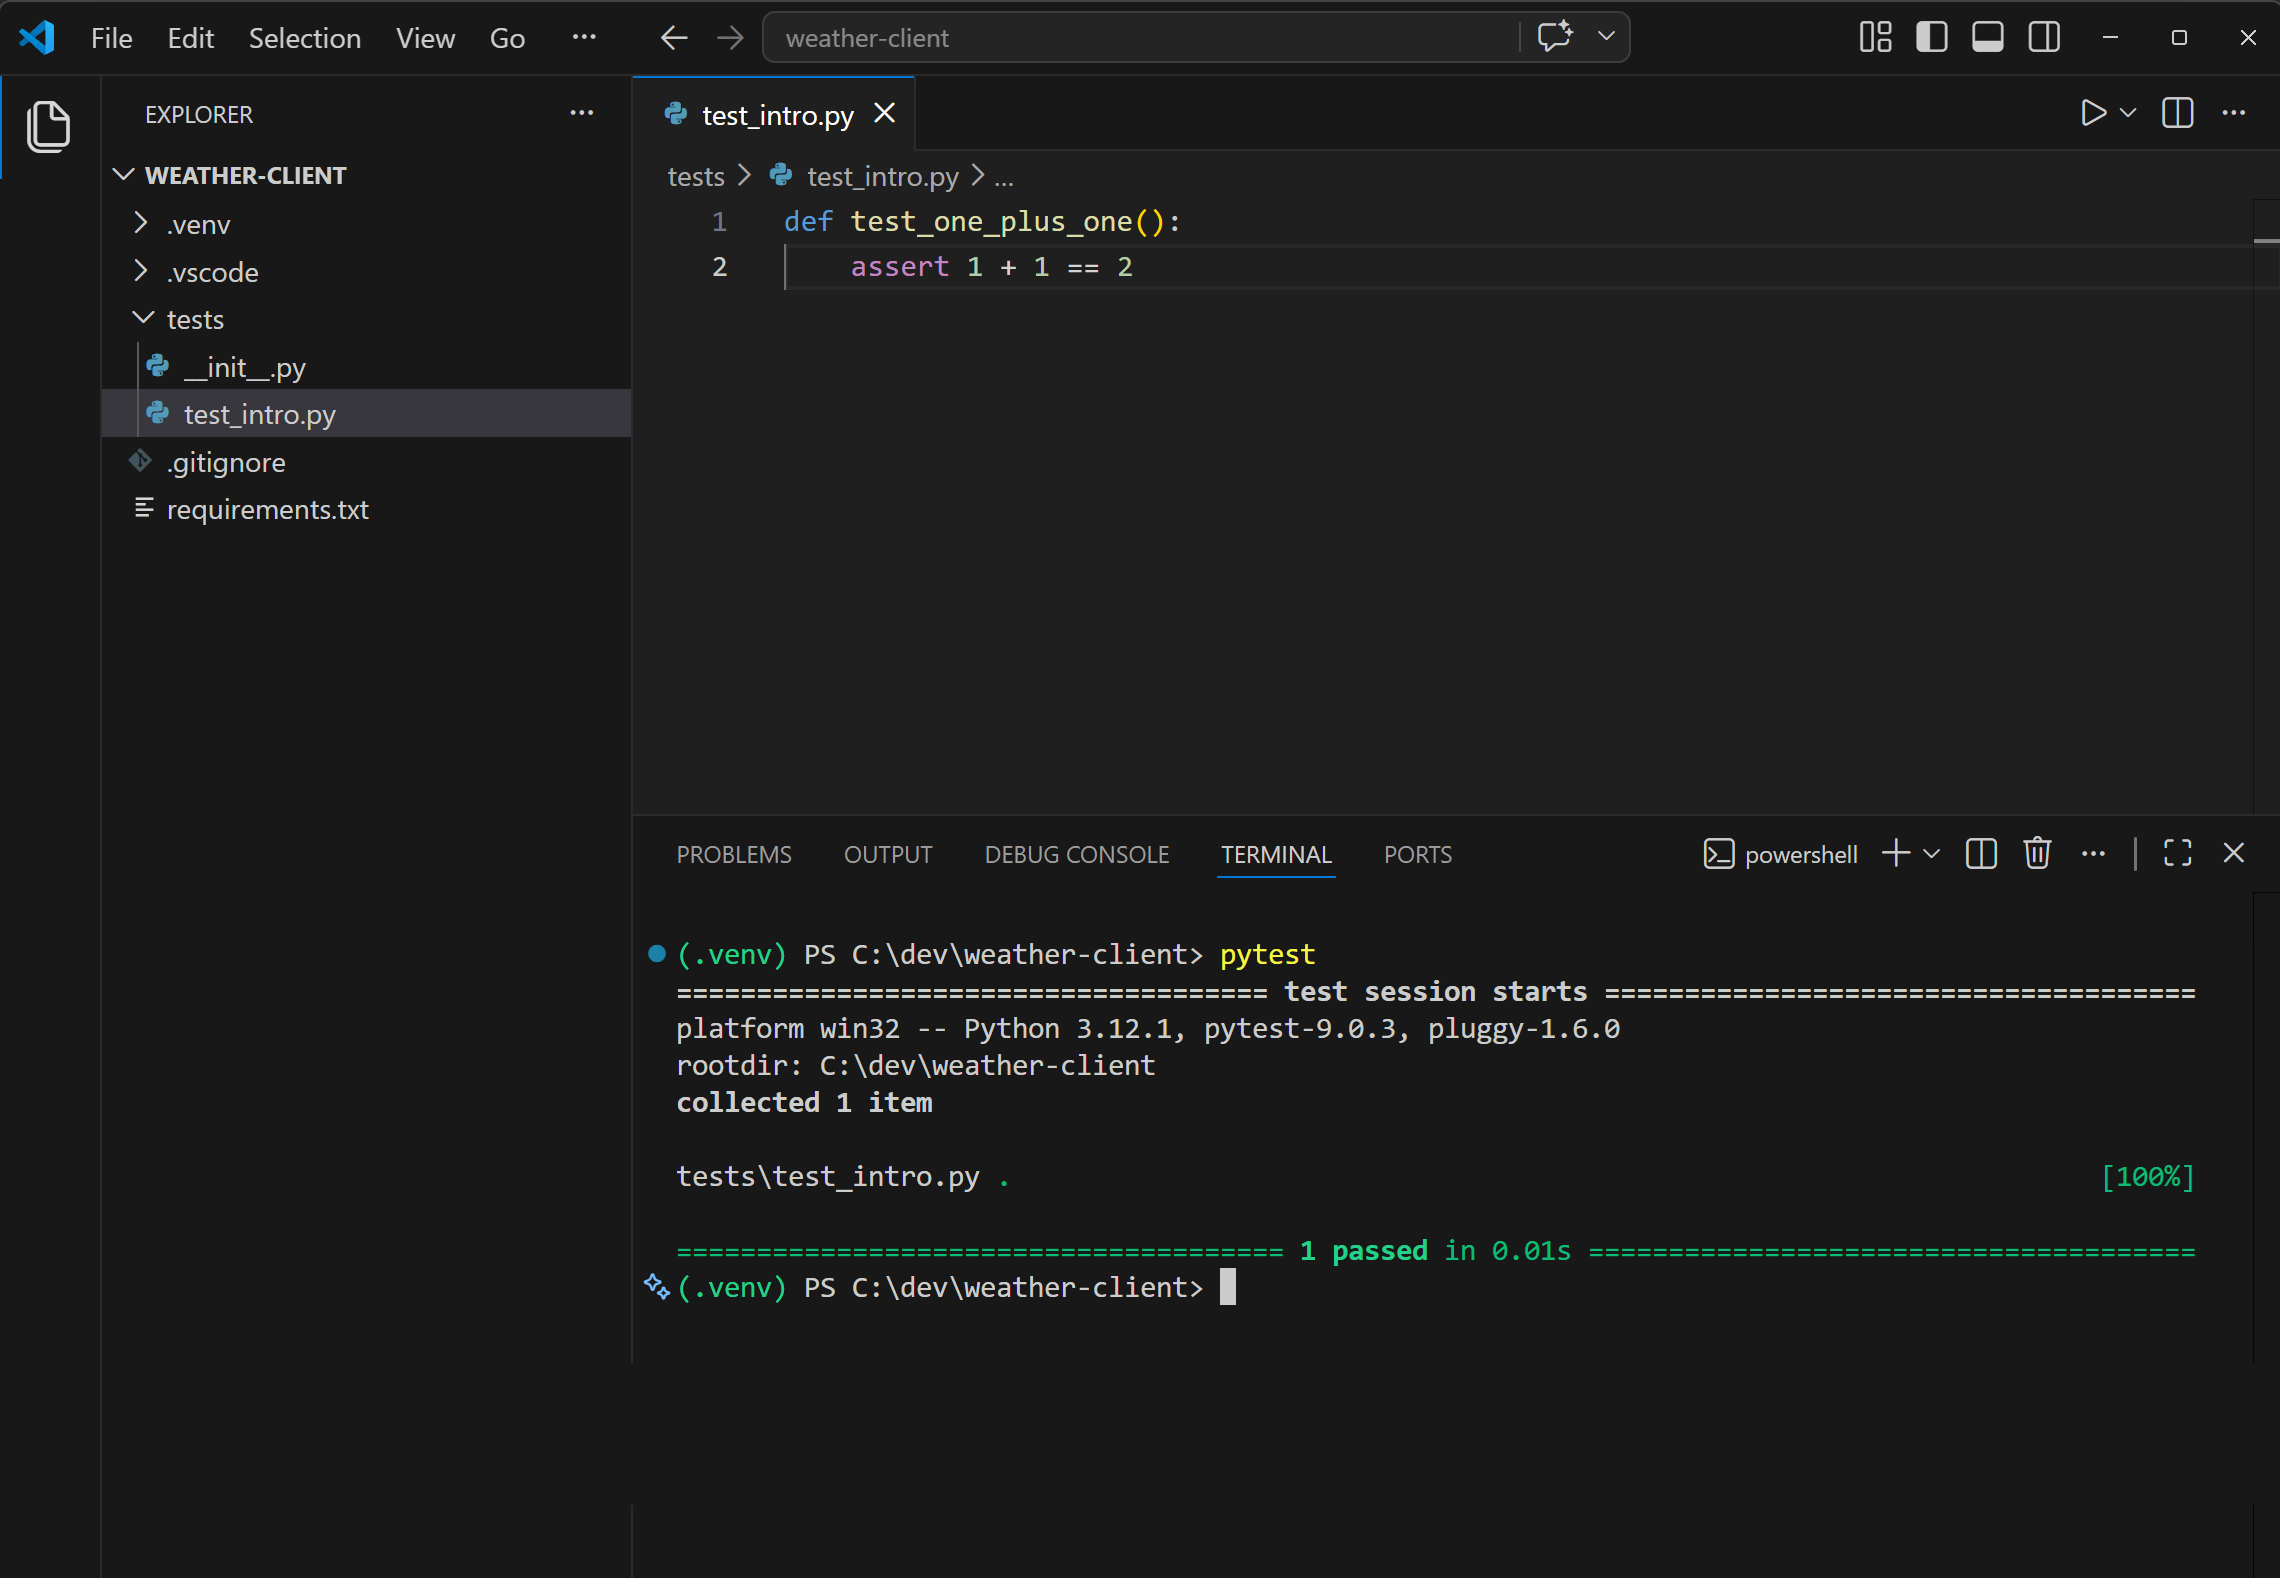
Let's write the simplest test pytest can run. Create a tests/ folder in your project, and save this inside it:
def test_one_plus_one():
    assert 1 + 1 == 2
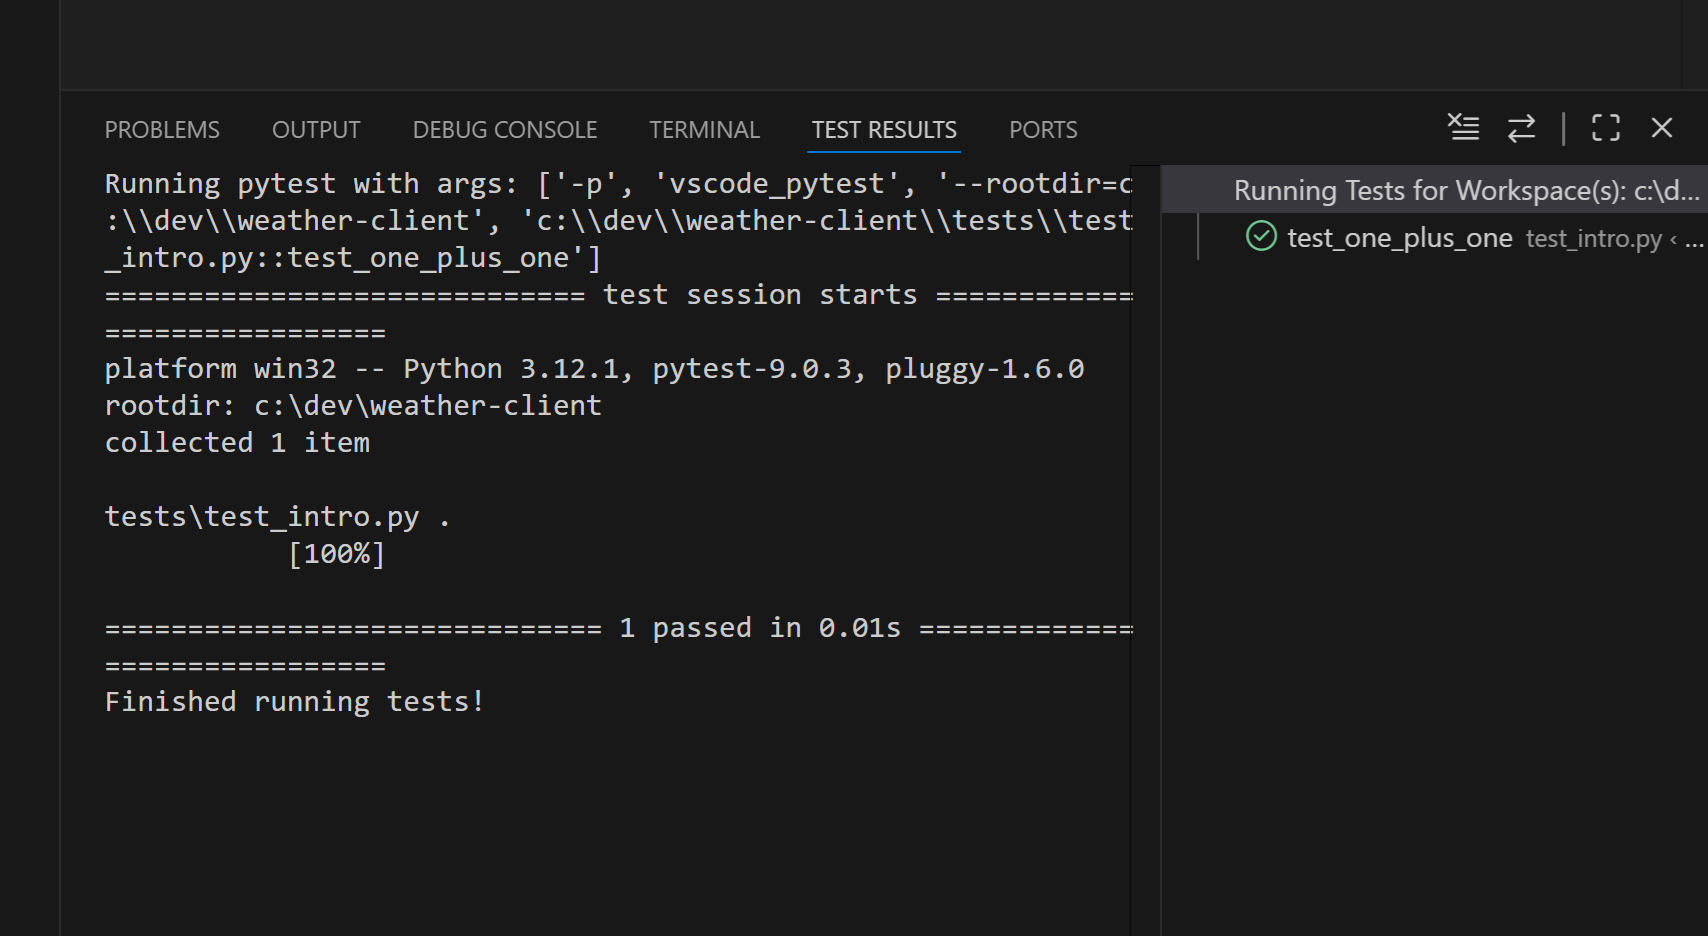
Save the file, then run pytest from your terminal (with the (.venv) prefix showing). You should see pytest collect the one test, run it, and report a satisfying green 1 passed:
Now let's break it. Change == 2 to == 3, save, and rerun:
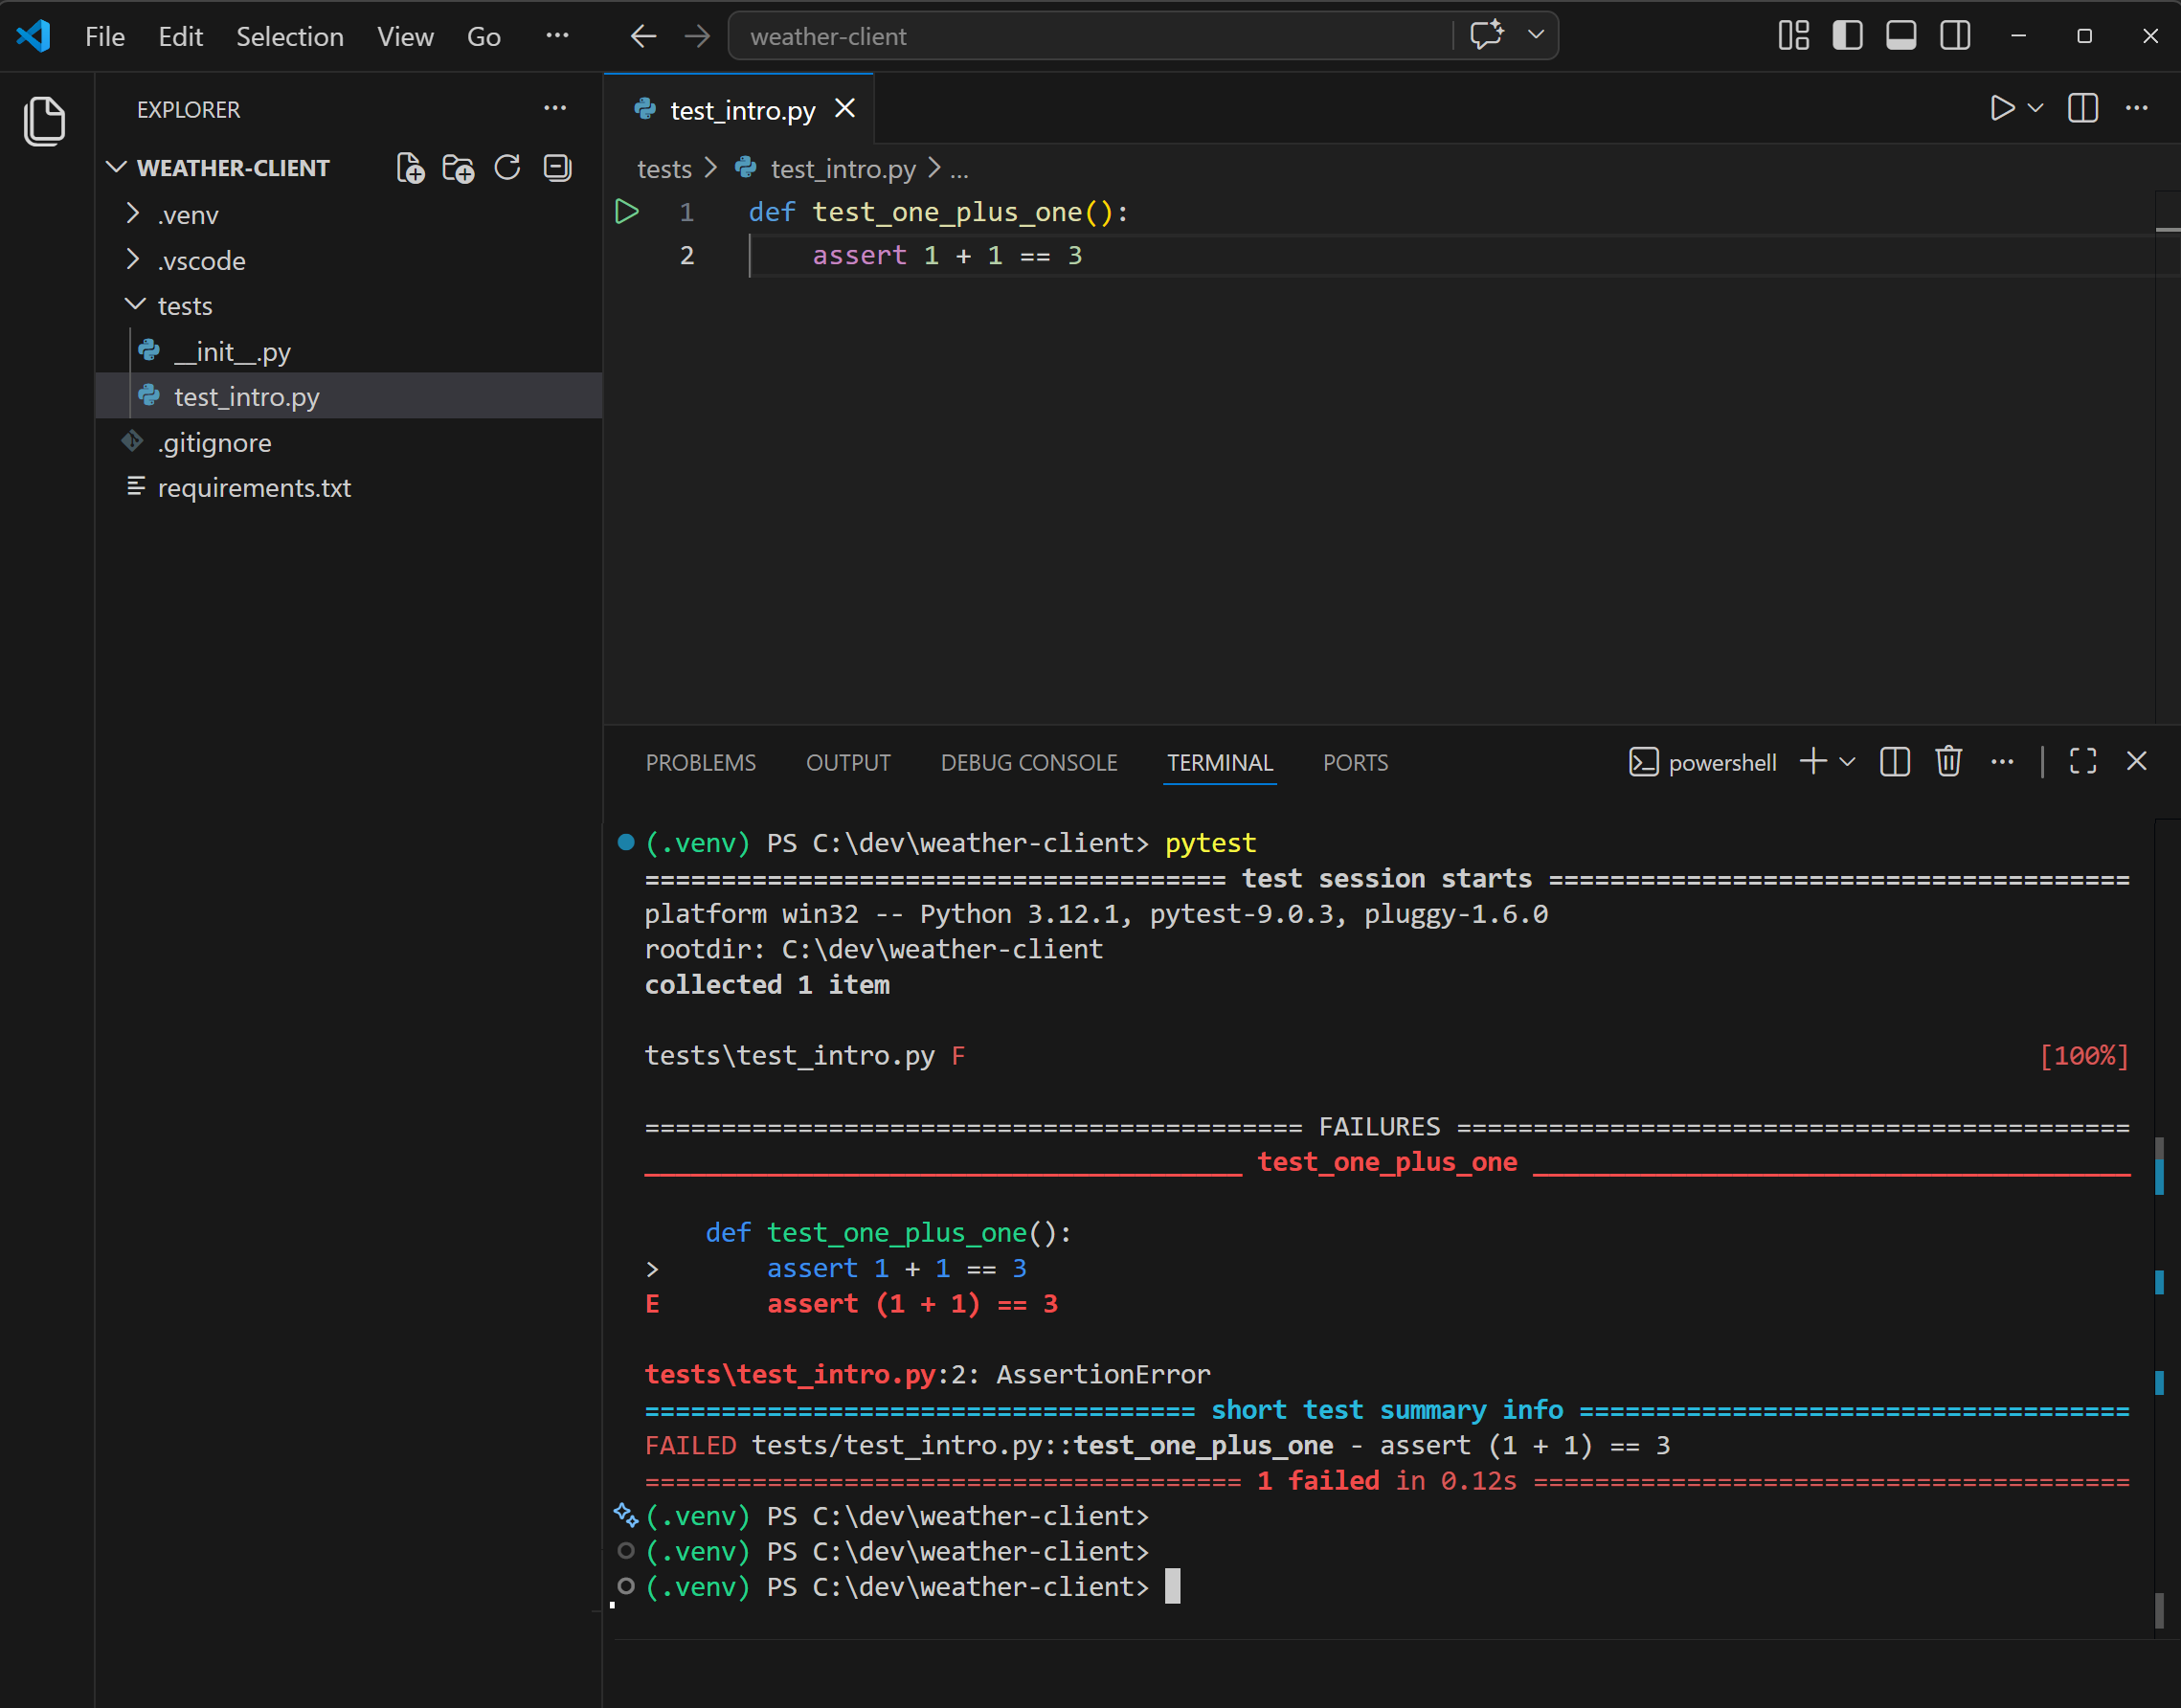
Notice what pytest does on failure. It prints the failing line, expands the assertion (assert (1 + 1) == 3), and shows you both sides of the comparison. That diff-style output is one of pytest's best features: you don't need a custom assertion library, because pytest rewrites your assert statements to show you the values when they fail.
That's the whole feedback loop: write an assertion, run pytest, read the output. Every technique later in this guide is a more sophisticated version of the same cycle.
Run tests from the Testing panel
The terminal is the core of the feedback loop, but VS Code also has a built-in GUI for running tests, and once you've configured pytest (which you did via .vscode/settings.json in Section 1), it just works.
Click the flask icon in the activity bar on the left (circled in yellow below):
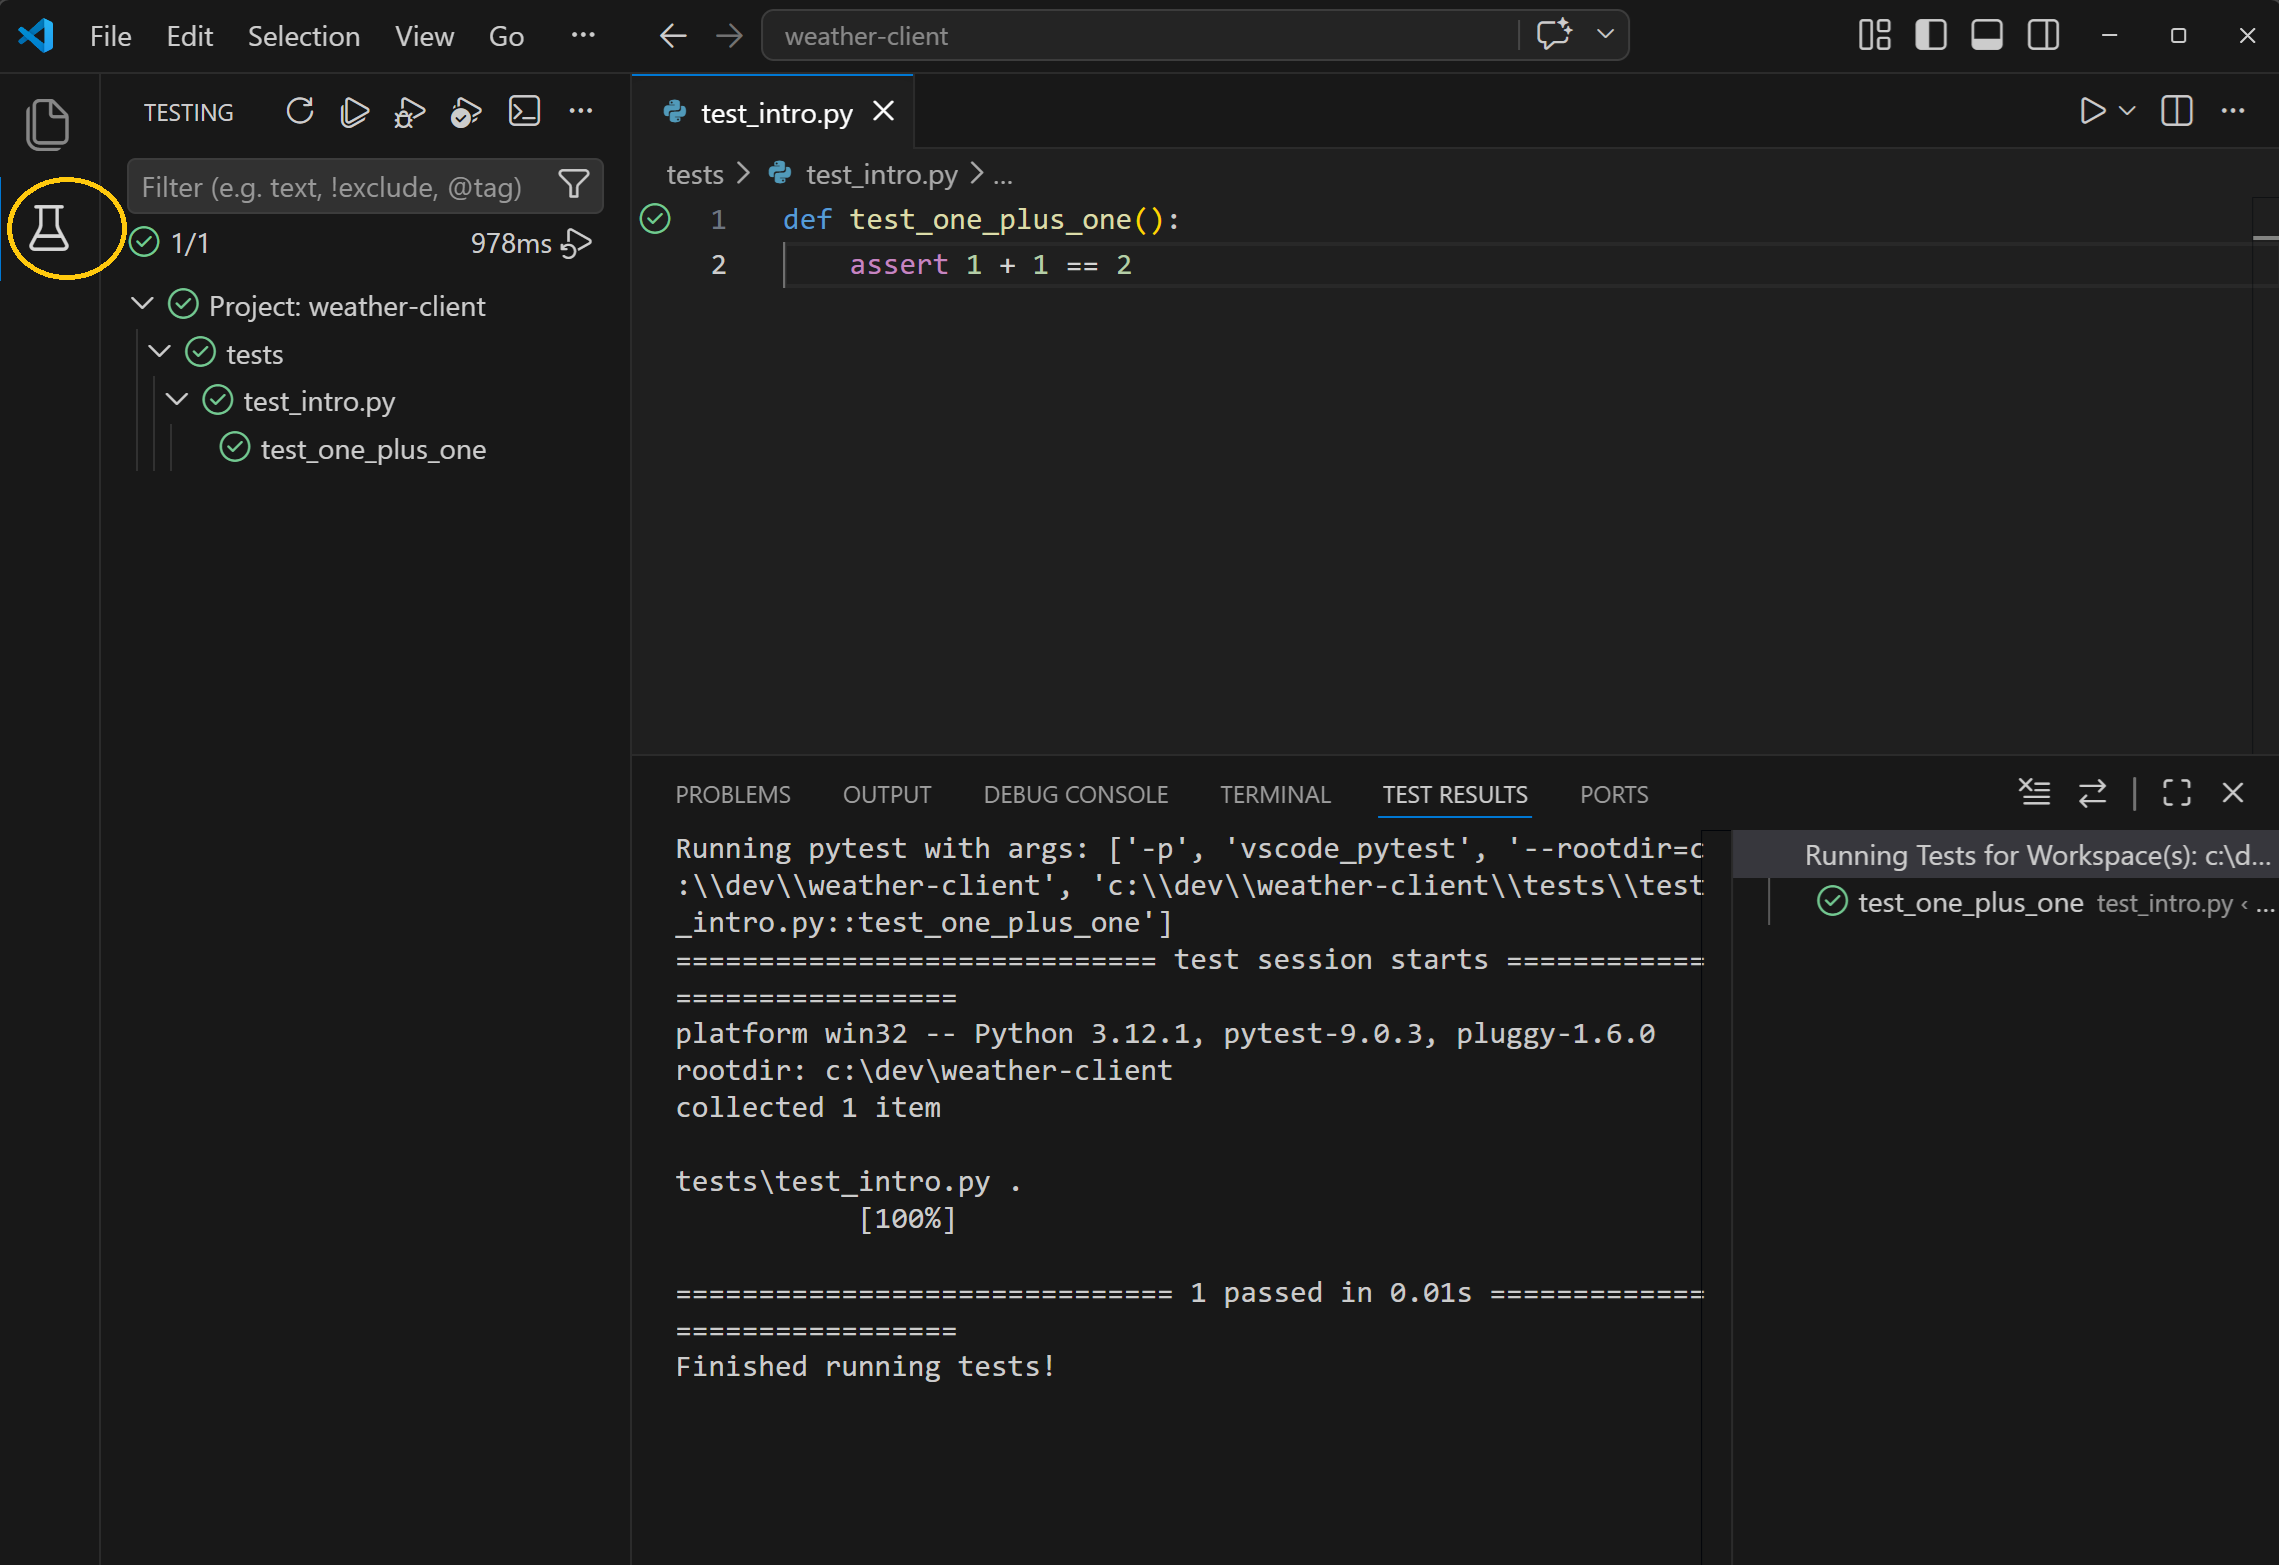
That opens the Testing panel. Expand the tree and you'll see your project, the tests folder, test_intro.py, and finally the test_one_plus_one function at the bottom. Hover any test for a play button; click it and pytest runs just that one. A green tick appears next to anything that passes:
Notice the little green tick in the editor gutter at line 1 too. Once pytest has run a test at least once, VS Code marks its status inline with the code. Red X on failure.
When to use which: the GUI is great for running a single test while you're iterating on it, and for getting visual feedback without leaving the editor. The terminal is still where you'll run the full suite, and it gives you pytest's richer output when things fail. You'll use both throughout this guide.
What this guide covers
The rest of this guide builds up a production-grade test suite for a real Flask app, one that calls an external API, handles sessions, and runs an OAuth flow. The approach is consistent throughout: stay as close to production as possible, but draw careful boundaries where reality gets flaky. Real Flask, real HTTP shapes, real session cookies, real fixtures, but no network, no live credentials, no flaky connections. That's the sweet spot most real-world test suites aim for, and every technique you'll pick up in the next few sections is there to help you find it.