2. How OAuth moves permission safely
OAuth looks complicated because several short-lived values move between the browser, your application, GitHub, and the API. The safety comes from each value doing one narrow job: identify the app, carry the user to consent, bind the callback to the original request, prove the app started the flow, and finally call the API with a limited token.
Authentication vs authorization
Authentication answers "Who are you?" It proves identity with a password, passkey, hardware key, biometric check, or another login method. Authorization answers "What can this application access?" It decides what actions are allowed after identity has been established.
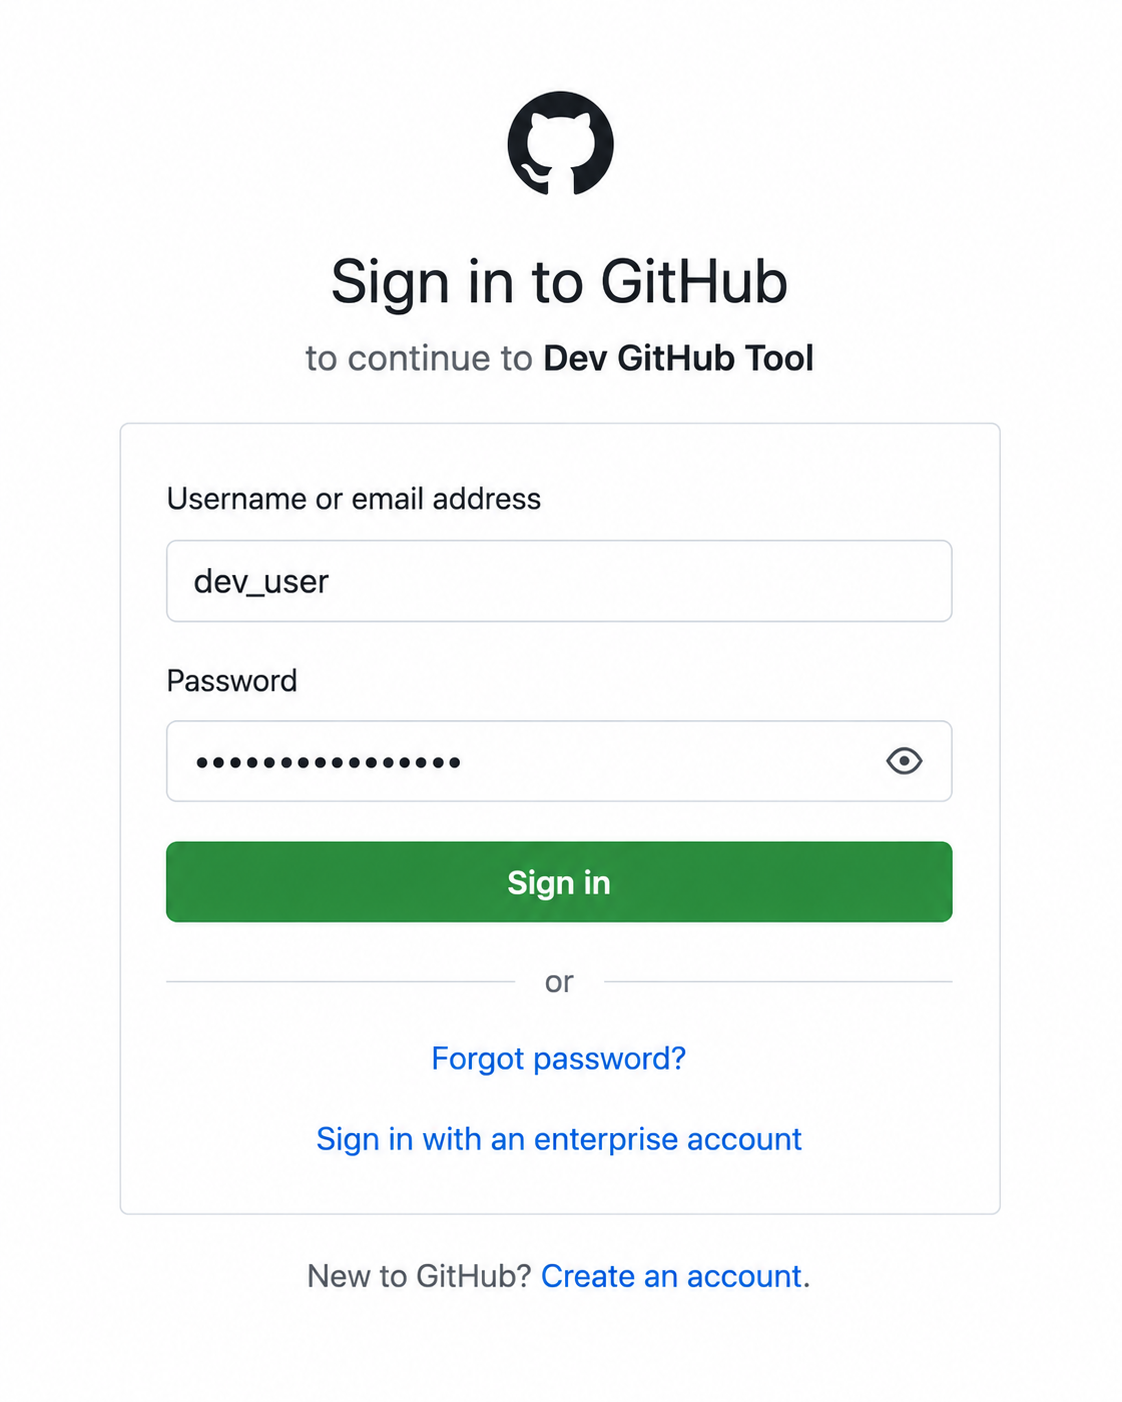
OAuth is primarily about authorization, but it often sits beside authentication. GitHub authenticates the user when they sign in on GitHub's own site. Your Python app asks for permission to do a limited job on that user's behalf, and this is the authorization step.
The four OAuth roles
The previous page used simple labels: GitHub as the OAuth provider, the GitHub API as the thing being accessed, and the access token as the permission your app receives. OAuth has more precise names for those parts. Learning those names helps you debug the flow later, because each error usually belongs to one role.
Every OAuth flow involves four roles. In this chapter GitHub plays two of them, which is common for developer APIs.
- Resource owner: the user who owns the data. Here, that is the GitHub user connecting their account.
- Client: the application requesting access. Here, that is your Python Dev GitHub Tool.
- Authorization server: the system that handles login, consent, and token issuing. Here, that is GitHub's OAuth service.
- Resource server: the API that holds the protected data. Here, that is the GitHub REST API.
You only build the client. GitHub already owns the login screen, consent screen, token endpoint, and API.
In larger systems these roles can be separated. A company might use a dedicated identity provider such as Okta or Auth0 for login and consent while storing the protected business data behind a separate API. The role names help you reason about those larger systems without changing the client-side pattern you are learning here.
The authorization code flow
The flow you will build keeps the access token out of the browser. GitHub sends the user back to your app with a short-lived authorization code, not the final token, and your app trades that code for the real token in a separate request to GitHub.
Here is the whole path at a glance. The six steps below follow it in the same order.
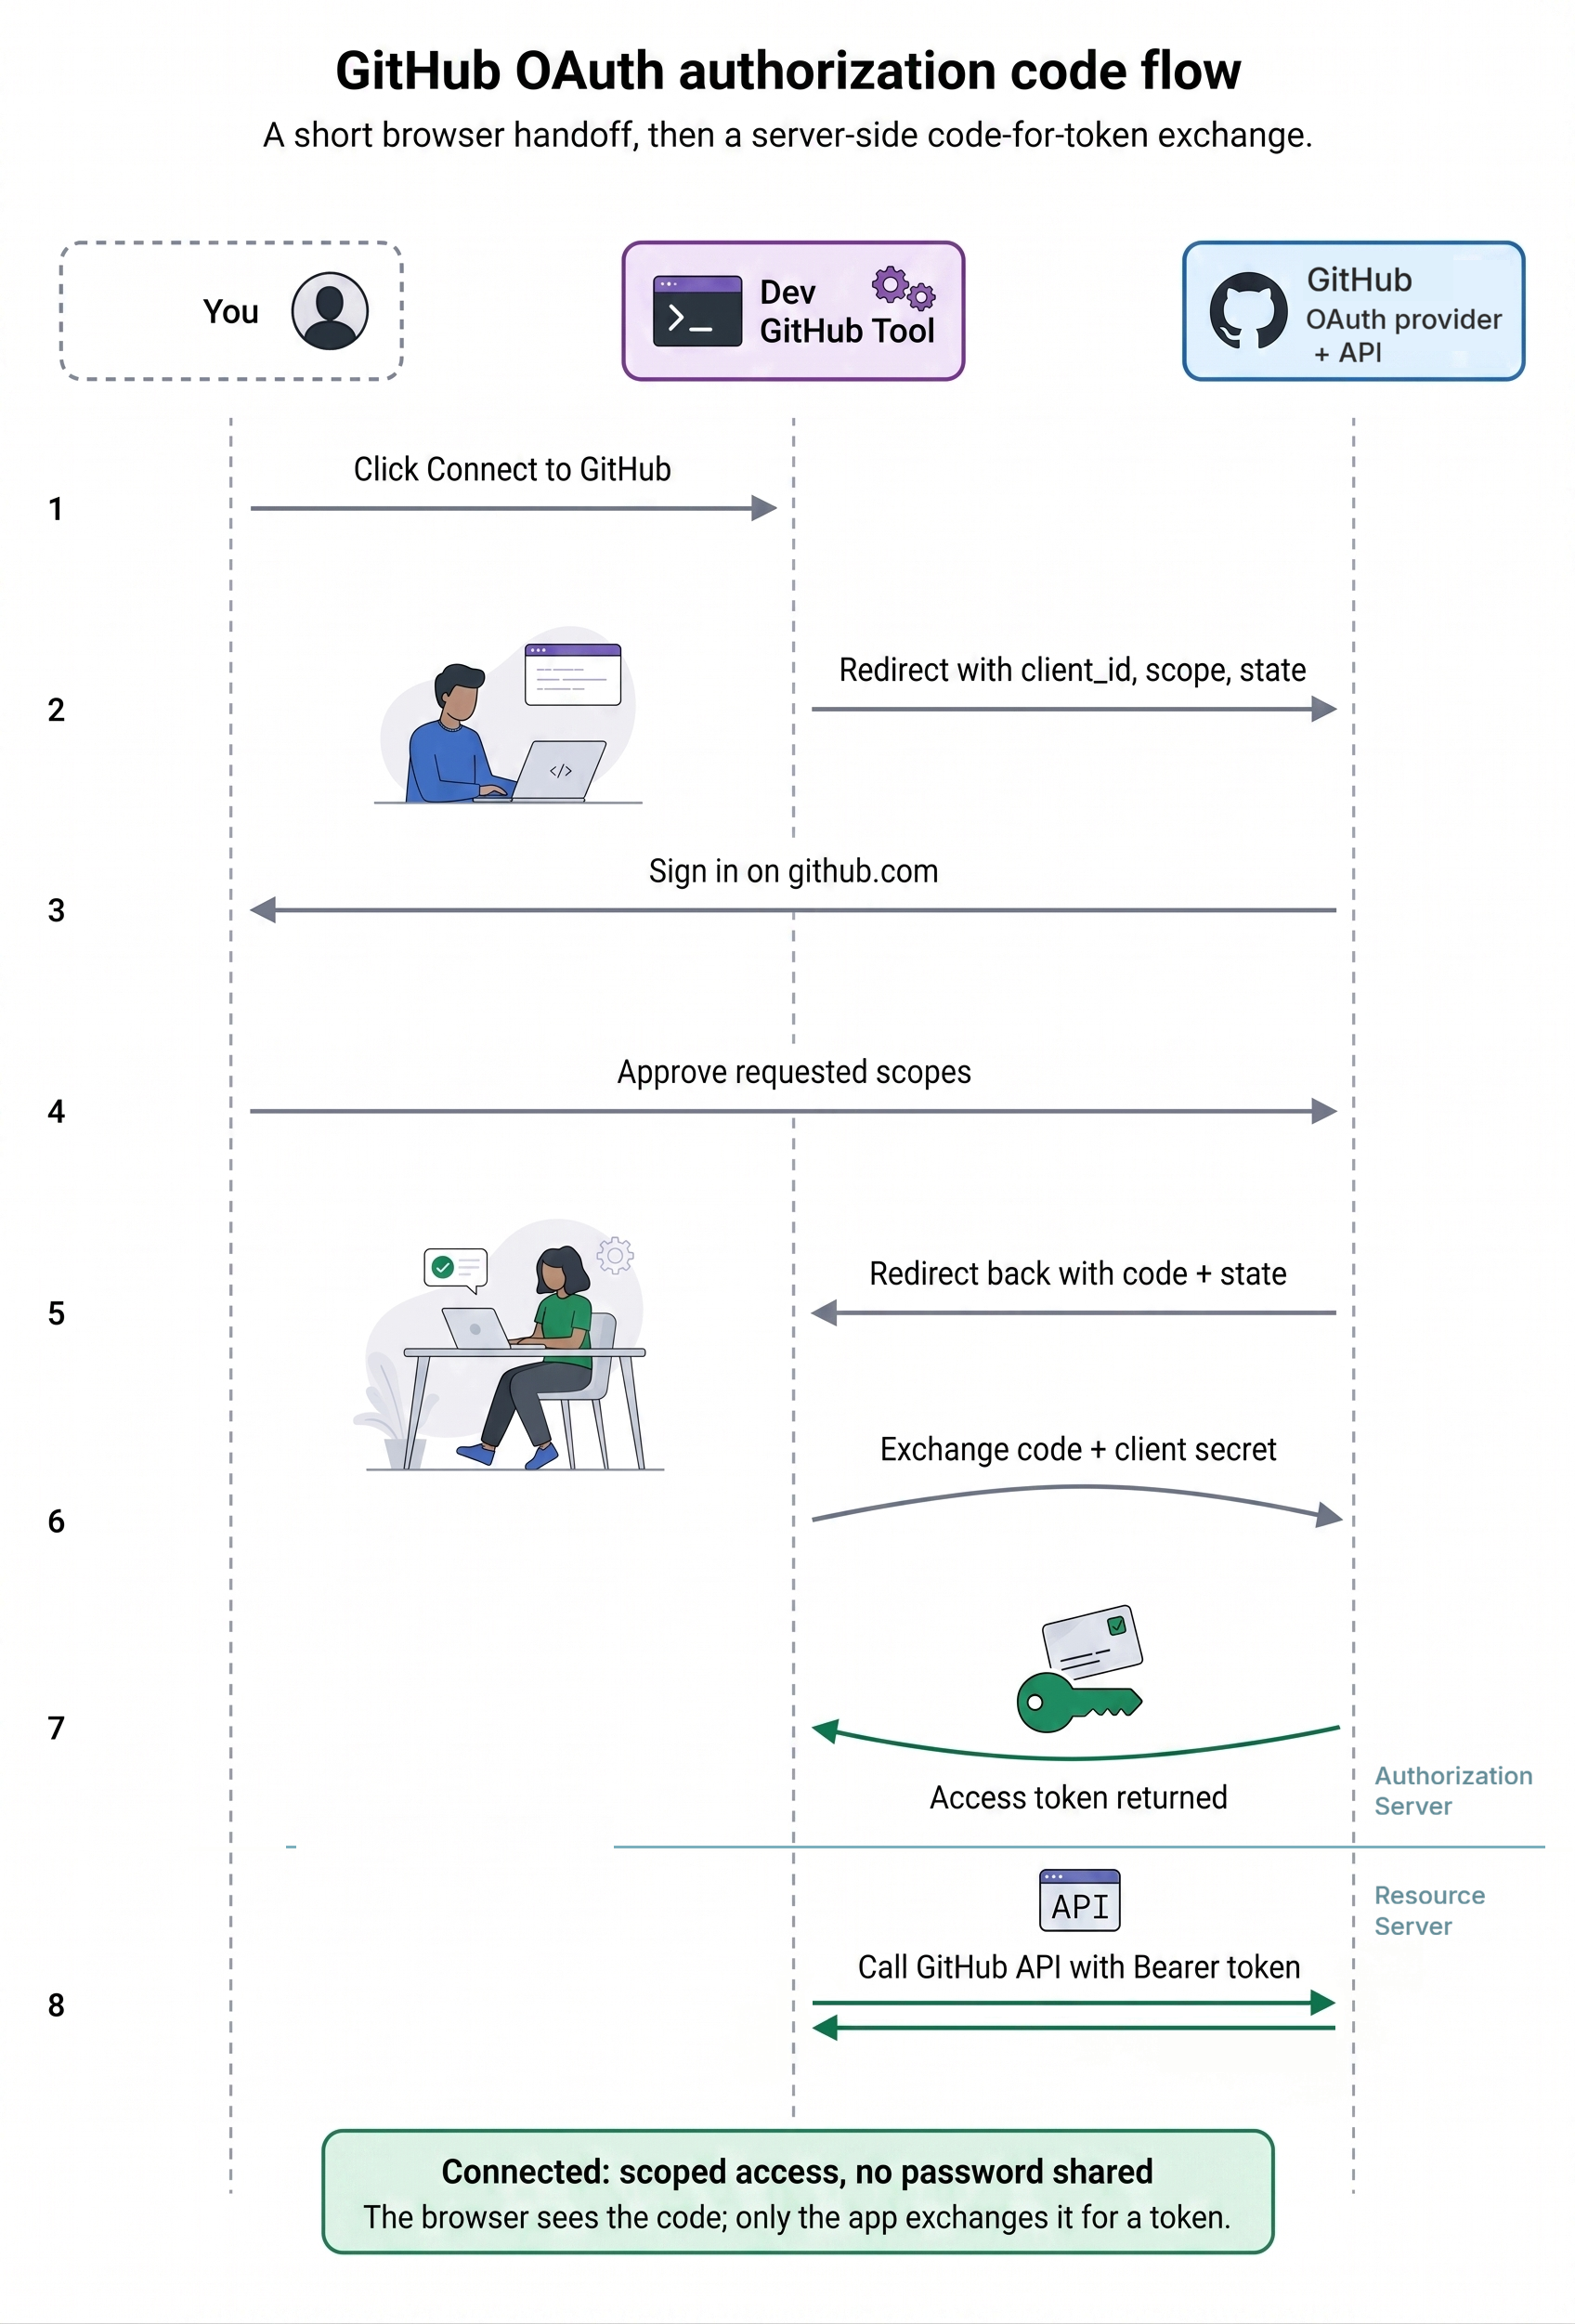
- Prepare the secrets. Your app generates a random
statevalue and a PKCEcode_verifier, then derives acode_challengefrom the verifier. - Send the user to GitHub. Your app redirects the browser to GitHub's authorization URL with
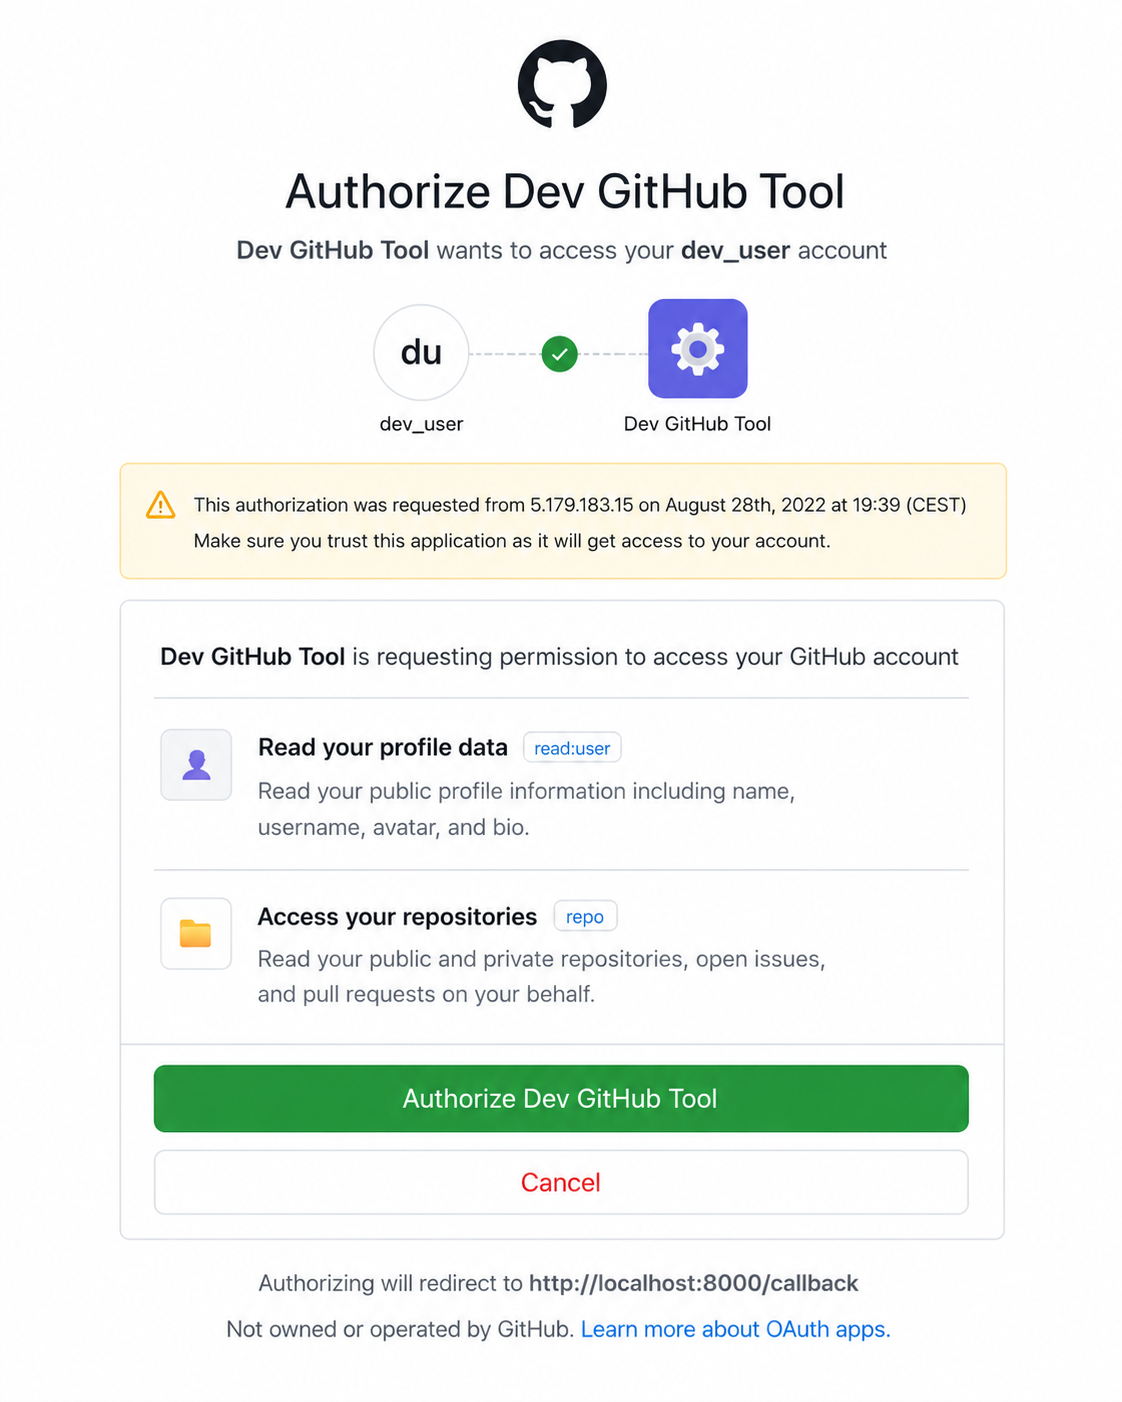
client_id,redirect_uri,scope,state, andcode_challenge. - The user signs in and approves. On GitHub's own page, the user authenticates and approves or rejects the access your app is requesting.
- GitHub redirects back with a code. GitHub returns the browser to your callback URL with a temporary
codeand thestateyou sent. - Verify, then exchange the code. Your app compares the returned
statewith the stored value and aborts on a mismatch, then sends thecode, the client secret, and the originalcode_verifierto GitHub's token endpoint, which returns an access token. - Call the API. Your app sends the access token in the
Authorizationheader on every GitHub API request.
This is the complete map of the flow. Later in the chapter, you will build each step slowly and see exactly where the code fits.
Why do we need a code first, then a token?
Look at where the redirect lands. GitHub appends the value to your callback URL, so it arrives in plain sight in the address bar: http://localhost:8000/callback?code=...&state=.... Browser URLs are not private. They are saved in history, written to server logs, and read by extensions. Treat anything that rides back in a URL as already leaked.
That is the whole reason the value in the URL is a code and not the access token. The token itself never touches the browser. During the exchange, your server sends the code to GitHub's token endpoint, along with the client secret and the original PKCE code_verifier. The user's browser does not see this request, and the access token does not appear in the callback URL.
PKCE adds one more protection. Before the redirect, your app created a one-time code_verifier and sent GitHub only a derived code_challenge. Later, GitHub releases the token only if the app can present the original verifier that matches that challenge.
That means a stolen authorization code is not enough. If someone copies the code from browser history or a log file, they still cannot exchange it for a token without the matching code_verifier.
In this chapter, you use both a client secret and PKCE. The client secret identifies your registered OAuth App. PKCE proves that the app exchanging the code is the same one that started the flow. Together, they protect different parts of the process.
The pieces your app tracks
| Piece | What it does | Where it lives |
|---|---|---|
| Client ID | Public identifier for your OAuth App. | Safe to include in authorization URLs. |
| Client secret | Private credential for your OAuth App. | Loaded from .env; never committed. |
| State | Binds the callback to the flow your app started. | Generated per flow; checked before token exchange. |
| Code verifier | PKCE secret generated by your app. | Kept by your app until token exchange. |
| Code challenge | Hash derived from the verifier. | Sent to GitHub in the authorization URL. |
| Authorization code | Temporary proof that the user approved the request. | Received on callback; exchanged once. |
| Access token | Credential used to call the API. | Kept private; sent only in API request headers. |
With the model in place, the next step is setup: register the GitHub OAuth App and create the local project files the code will depend on.