3. Your first test
Your environment is ready. Before the real tests, let's meet pytest properly, get a trivial test passing, and then watch it fail on purpose. That write-run-read loop is the foundation for every technique in the rest of the guide.
Pytest
pytest is a testing framework (Python package). You installed it in the previous section, Setting up your environment, and we will be using it throughout this guide to write and run our tests.
pytest is a test runner. It doesn't force you to write tests in a particular style, or use a particular assertion library, or even use classes at all. It's just a tool that finds your tests and runs them, and it gives you great output when they fail.
One important thing before we write our first test: pytest discovers test files and test functions by convention, not configuration, so follow the naming rules:
- Put test files in a
tests/directory next to your source. - Name test files
test_*.py(or*_test.py). - Name test functions
test_*. - Use Python's built-in
assertfor conditions.
Write and run it
Let's write the simplest test pytest can run. Create a tests/ folder in your project, and save this inside it:
def test_one_plus_one():
    assert 1 + 1 == 2
Save the file, then run pytest from your terminal (with the (.venv) prefix showing). You should see pytest collect the one test, run it, and report a satisfying green 1 passed:

Now let's break it. Change == 2 to == 3, save, and rerun:
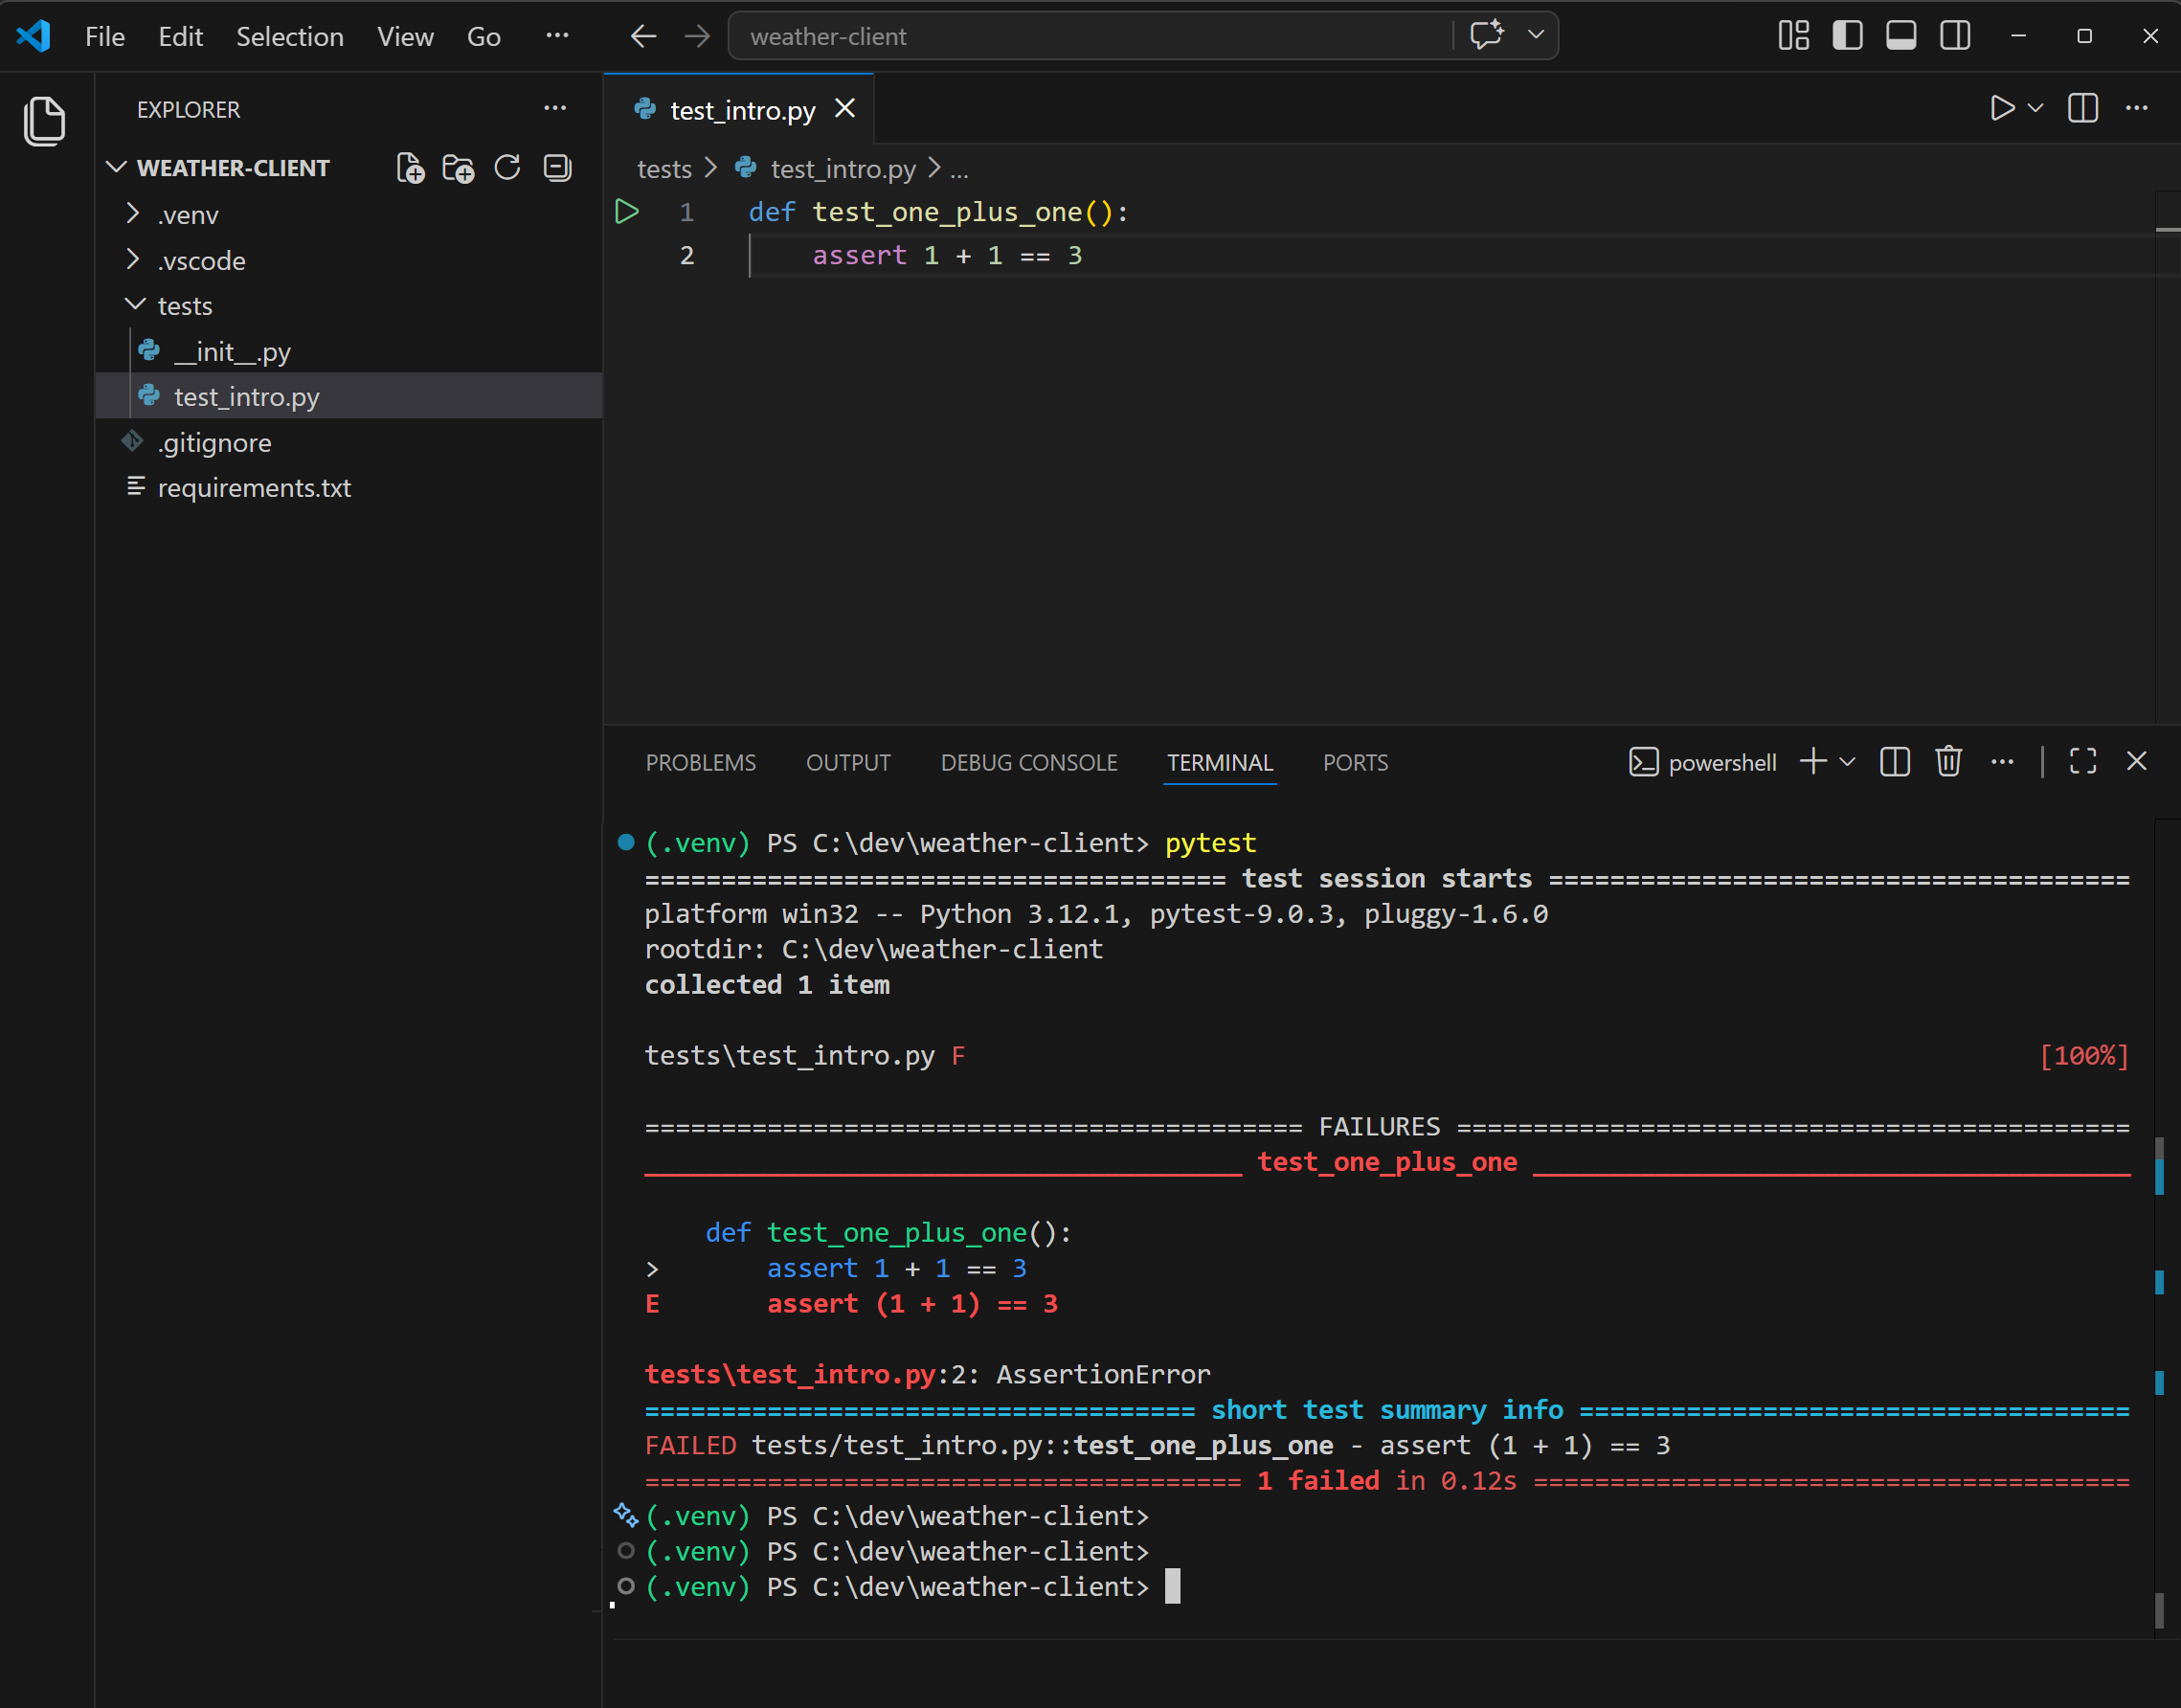
Notice what pytest does on failure. It prints the failing line, expands the assertion (assert (1 + 1) == 3), and shows you both sides of the comparison. That diff-style output is one of pytest's best features: you don't need a custom assertion library, because pytest rewrites your assert statements to show you the values when they fail.
That's the whole feedback loop: write an assertion, run pytest, read the output. Every technique later in this guide is a more sophisticated version of the same cycle.
Run tests from the Testing panel
The terminal is the core of the feedback loop, but VS Code also has a built-in GUI for running tests, and once you've configured pytest (which you did via .vscode/settings.json in Setting up your environment), it just works.
Click the Testing icon in the activity bar on the left (it looks like a laboratory flask and is circled in yellow below):
That opens the Testing panel. Expand the tree and you'll see your project, the tests folder, test_intro.py, and finally the test_one_plus_one function at the bottom. Hover any test for a play button; click it and pytest runs just that one. A green tick appears next to anything that passes:
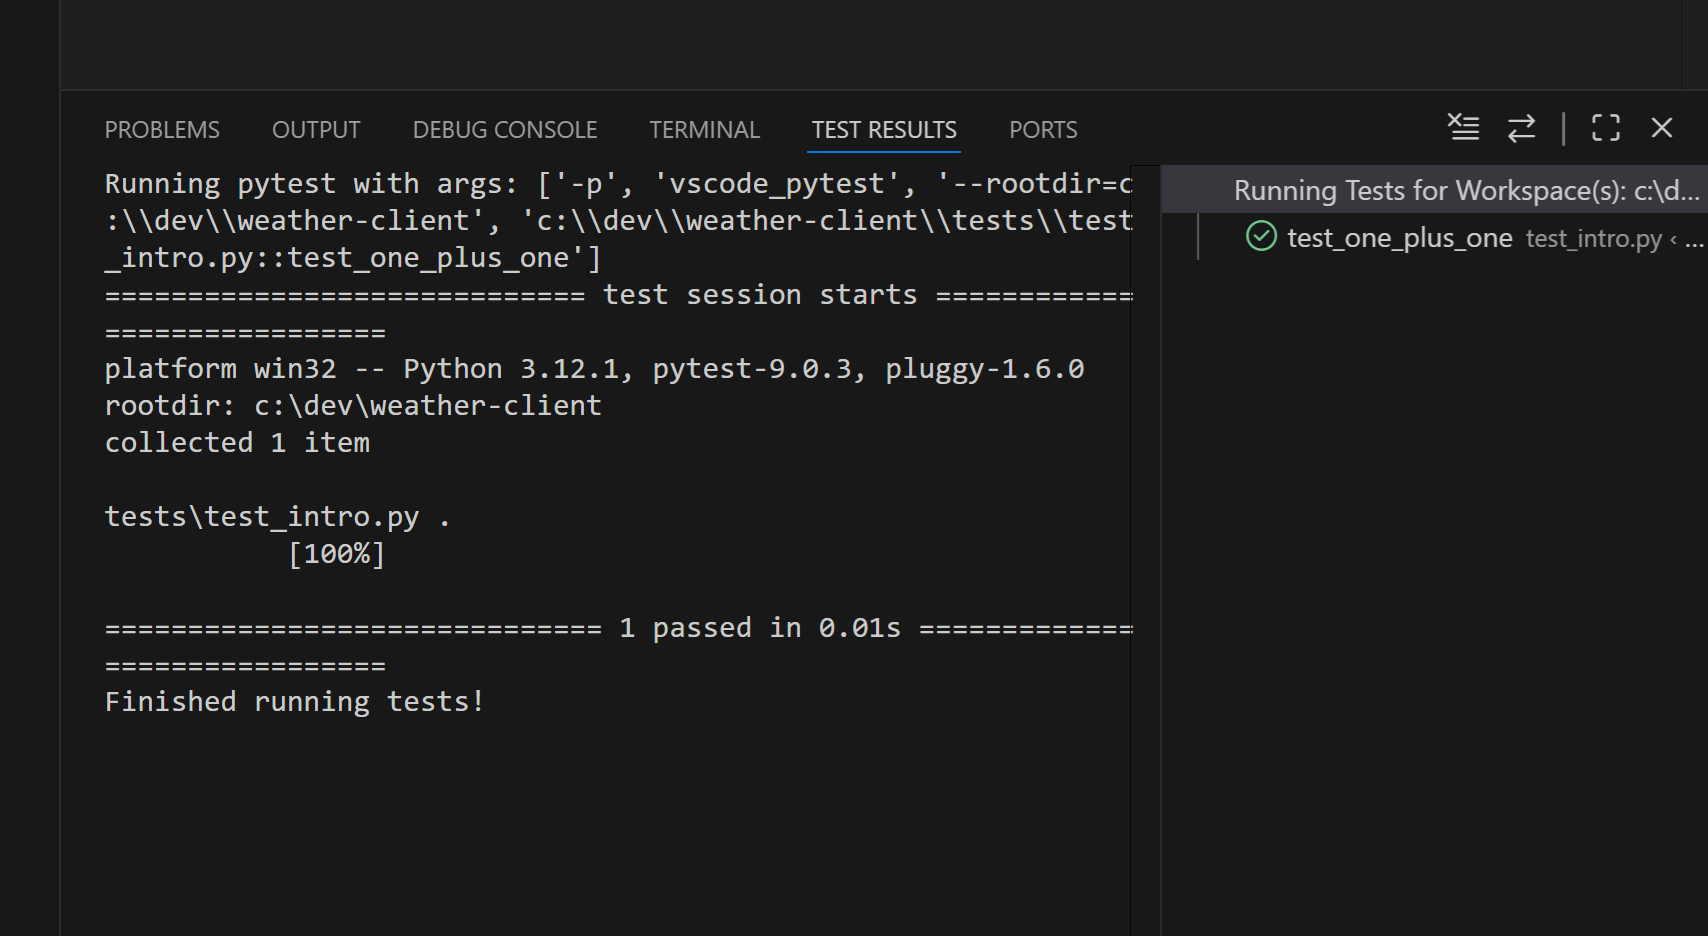
Notice the little green tick in the editor gutter at line 1 too. Once pytest has run a test at least once, VS Code marks its status inline with the code. Red X on failure.
When to use which: the GUI is great for running a single test while you're iterating on it, and for getting visual feedback without leaving the editor. The terminal is still where you'll run the full suite, and it gives you pytest's richer output when things fail. You'll use both throughout this guide.