Chapter 13: Production-Ready Weather Dashboard Capstone
1. From prototype to production
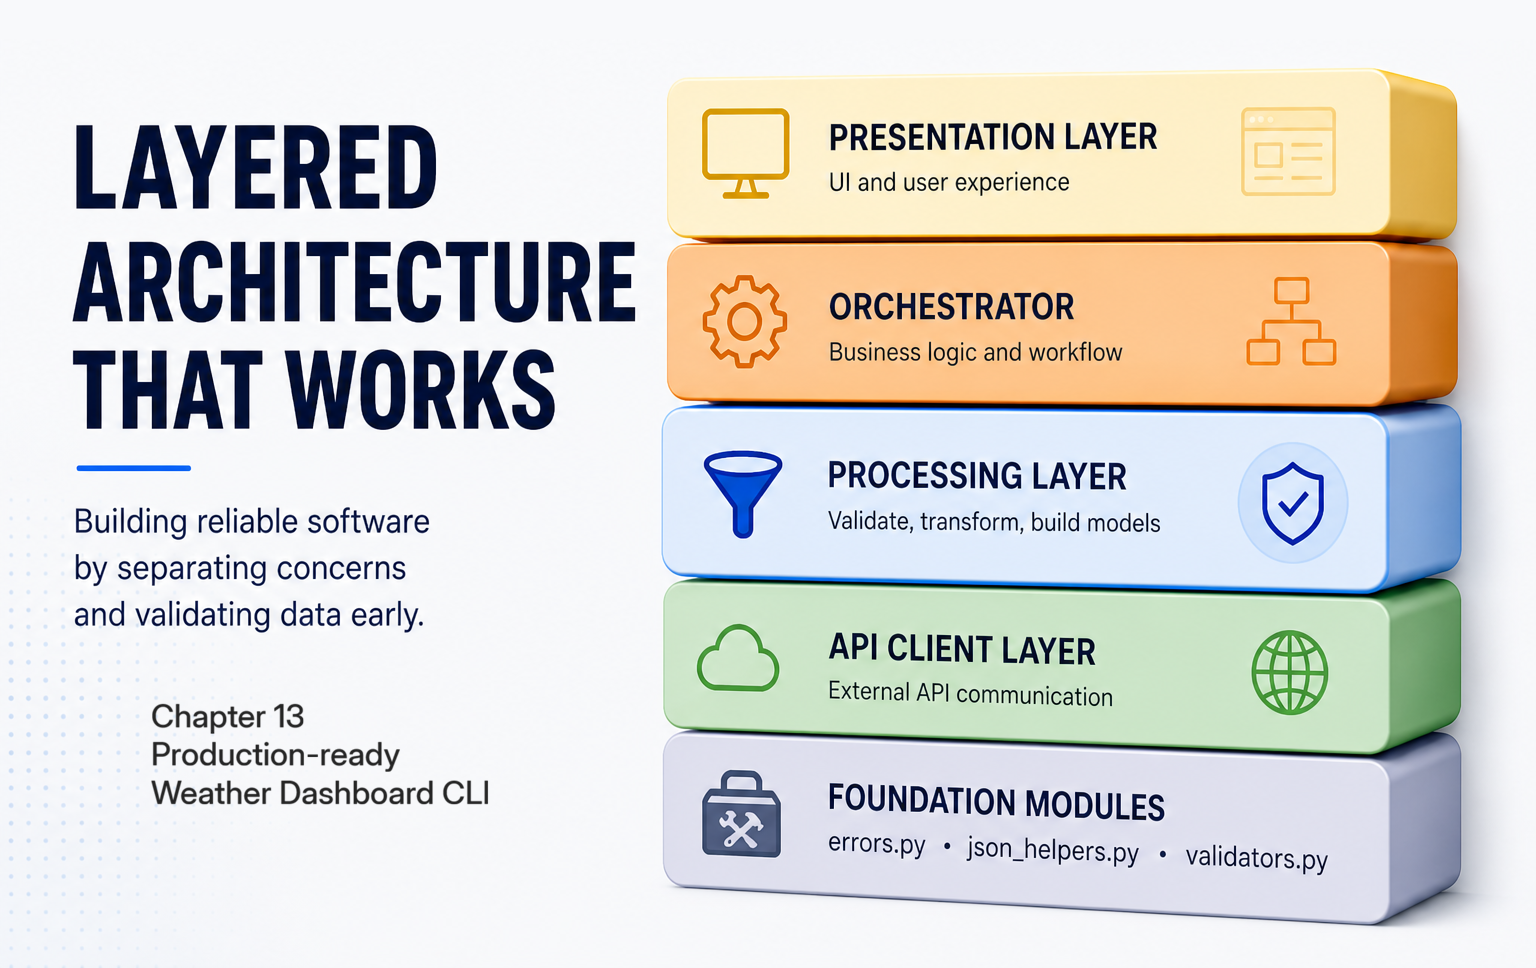
In this chapter you'll rebuild Chapter 8's weather dashboard into a production-grade system: four layers built on a shared foundation of utilities from earlier chapters. The result survives network drops, malformed responses, and the kind of failure modes a prototype quietly hides. By the end you'll have a layered project on disk, a test suite that runs in seconds, and a CLI you can point at any city in the world.
The toolkit
Three modules from earlier chapters come together here: error categorisation and retry (covered in Chapter 9), safe JSON navigation (covered in Chapter 10), and three-layer validation (covered in Chapter 12). This chapter is where they work as one system inside a single workflow.
If you're landing here directly
You don't need to have read Chapters 9, 10, or 12. This chapter includes errors.py, json_helpers.py, and validators.py as drop-in modules. Copy them in and you're set up (§3 walks you through it). The patterns are explained as they appear.
Chapter 8's prototype, and where it falls short
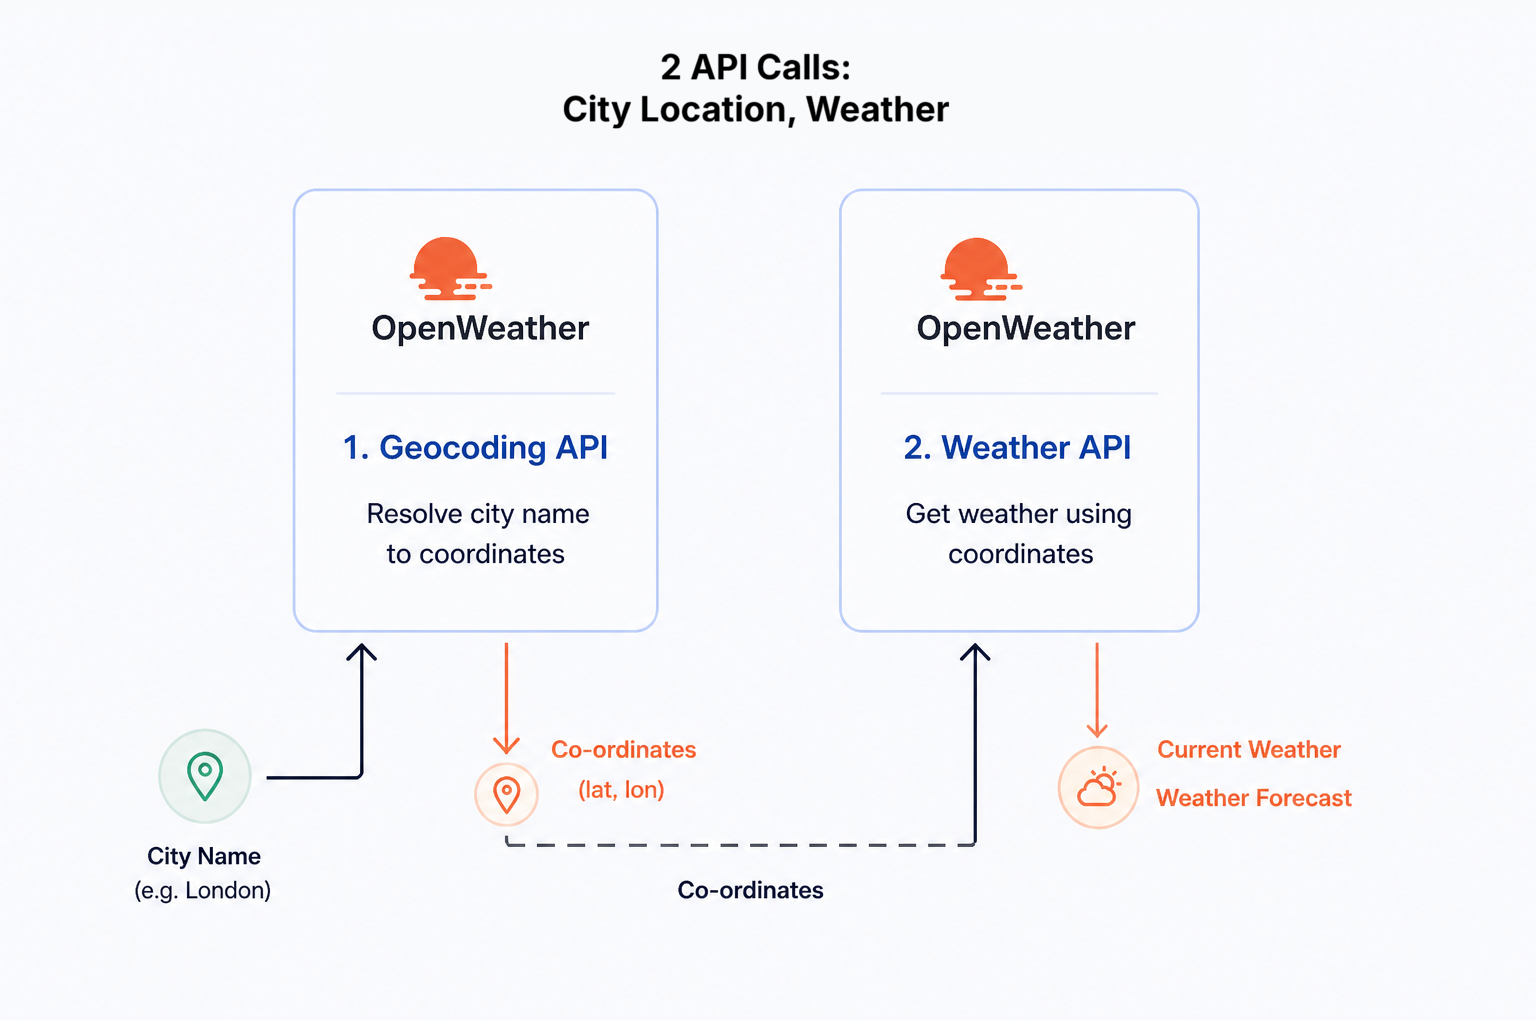
The prototype chains two API calls in a single function: first geocode the city to coordinates, then fetch weather for those coordinates. Fine in development, but a stack of failure modes surfaces the moment real-world conditions hit.
One thing to flag before the code: Chapter 8 built this dashboard against Open-Meteo, which needs no API key, and the prototype below still reads temperature from Open-Meteo's current.temperature_2m. The production rebuild from §4 onward runs instead on OpenWeatherMap, the provider you set up a key for (covered in Chapter 7), so the temperature moves to main.temp, the endpoints become api.openweathermap.org, and every call carries your OPENWEATHER_API_KEY. If you're carrying Chapter 8's code forward, expect to repoint the URLs, add the key, and adjust those field paths as you rebuild.
get_weather_for_city.
Here's that function:
def get_weather_for_city(self, city_name):
    """Chapter 8: basic integration that works during development."""
    # Step 1: geocoding
    lat, lon, location_name = self.find_location(city_name)

    if lat is None:
        print("Cannot get weather without valid coordinates")
        return None, None

    # Step 2: weather data
    weather_data = self.get_weather_data(lat, lon)

    if weather_data is None:
        print("Cannot display weather without valid data")
        return None, None

    return weather_data, location_name
This is fine code for the conditions it was designed for. The moment those conditions change, six concrete failure modes surface:
- No error categorisation. A timeout, a 404, and a 500 all look identical to the caller.
- No retry logic. A one-second network blip becomes a hard failure even though one quick re-attempt would succeed.
- Generic error messages. "Cannot display weather without valid data" tells the user nothing about what went wrong or what to try next.
- No data validation. The code assumes
weather_datais well-formed; the moment a sensor returnsnull, the program crashes. - Brittle data extraction. Direct dictionary access like
weather_data["current"]["temperature_2m"]crashes the instant a field name changes. - Monolithic structure. Business logic, API calls, and error handling all live in the same function, so you can't test or replace any of them in isolation.
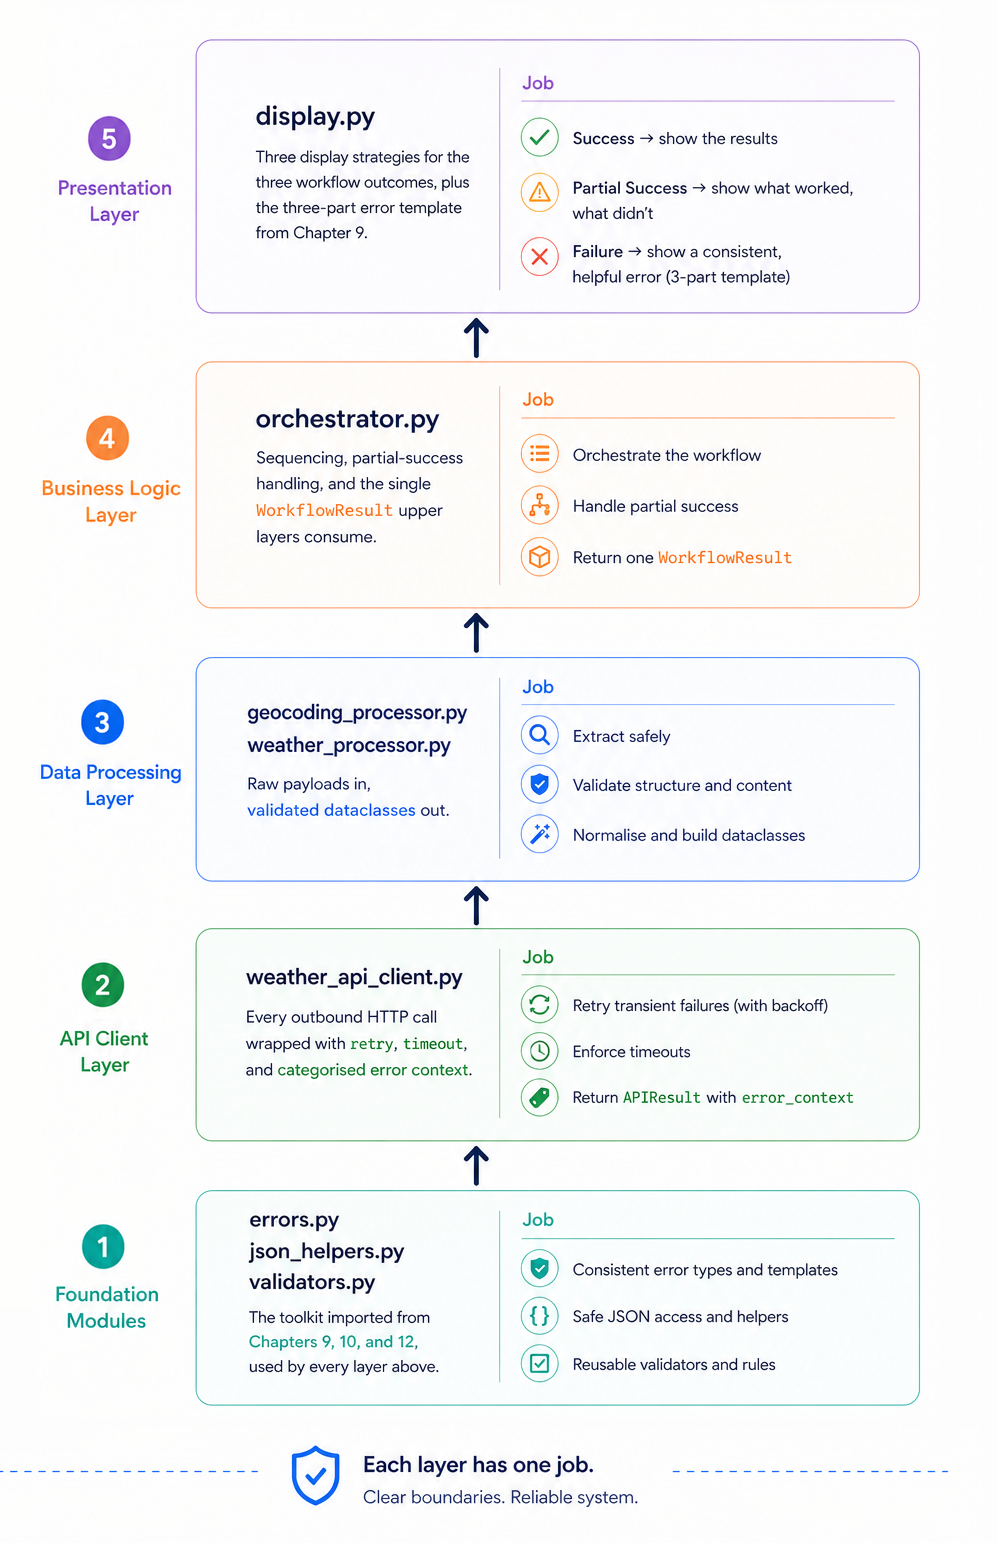
The fix isn't more code in get_weather_for_city. It's the layered shape above: categorisation and retry in the API client, validation and safe extraction in the processors, helpful error messages in the display layer. Each failure mode lives in the layer where it can be solved once, and the monolith breaks apart by definition.
Our architecture
The diagram below shows the architecture row by row: the file (or files) for each layer in the middle, the responsibilities on the right. The four layers (API Client, Data Processing, Business Logic, Presentation) are what you'll build in this chapter, one per section from §4 through §7. The bottom row holds the foundation modules from Chapters 9, 10, and 12, imported in §3 rather than written from scratch. Don't try to memorise it; it's a map of the chapter.
What this chapter delivers
What you'll learn
- Lay out a four-layer architecture on a shared foundation so each layer has one responsibility and one set of dependencies
- Import production patterns from earlier chapters as utility modules rather than re-implementing them
- Wrap an HTTP client so transient failures retry automatically and upper layers never handle raw
requestsexceptions - Combine safe navigation and three-layer validation into processors that surface partial data instead of crashing
- Coordinate a multi-step workflow so partial success is a first-class outcome, not an exception
- Match the display to the outcome so users see helpful guidance whether the workflow fully succeeded, partially succeeded, or failed
- Test the integrated system at three levels (unit, integration, end-to-end) without doubling the maintenance cost
What you'll build
errors.py— error categorisation, three-part messages, and exponential-backoff retry imported from Chapter 9json_helpers.py— safe-navigation helpers (safe_get,try_fields) imported from Chapter 10validators.py— the three-layer structural / content / business-rule validation pipeline from Chapter 12weather_api_client.py— a resilient HTTP client that returns standardisedAPIResultobjects so upper layers never see raw exceptionsmodels.py— theCoordinates,WeatherData, andWorkflowResultdataclasses every layer trustsgeocoding_processor.pyandweather_processor.py— response processors that validate, normalise, and surface partial data when fields are missingorchestrator.py— the workflow coordinator that runs geocoding then weather and packages the resultdisplay.py— three display strategies for the three workflow outcomes (success, partial success, complete failure)config.pyandweather_dashboard.py— the configuration shell and main coordinator that boot the apptests/— a unit-then-integration-then-end-to-end test pyramid that gives you confidence to keep changing the system
Section 2 sets up the project folder, virtual environment, API key, and a sanity check that confirms the toolkit is wired up before §3 starts the build.